Customize the admin's appearance
Create an appearance with your brand colours, skin and fonts, make it the admin's default look, and style the sign-in screen.
- Applies to
- Core 12.0 and later
- Who can do this
- Administrator, Platform owner
- Permission
feature.core. appearance. create - Where
- Configurations › Appearances
On this page
Before you start
- An appearance is a saved look: brand colours, skin, density and typography. The admin's look lives in appearances, and the Theme settings panel chooses which one is the default.
- To create an appearance you need
feature.. To edit one,core. appearance. create feature.. To set the default and style the sign-in screen,core. appearance.edit feature..core. theme.edit - Default Appearance is the look the installation started with. It can't be changed or deleted, because every screen falls back to it. Create your own instead.
Create an appearance
- Open Configurations › Appearances.
- Select New Appearance.
- On the Appearance tab, enter a Name (up to 191 characters) and, if you like, a Description (up to 500).
- On the Brand Colours tab, pick one of the Theme Patterns to fill the four brand colours in one click. Then fine-tune Primary Colour, Secondary Colour, Light Colour and Lighter Colour if you need to.
- On the Admin Appearance tab, choose the density, control size, menu colours, skin and layout options.
- On the Typography tab, choose the fonts, text size, weights and spacing for the whole admin.
- Select Save.
Tip: A language with its own typography overrides the Typography tab for people using that language.
Make it the admin's default look
-
Open Configurations › General Settings › Theme Settings. The Theme panel opens.
-
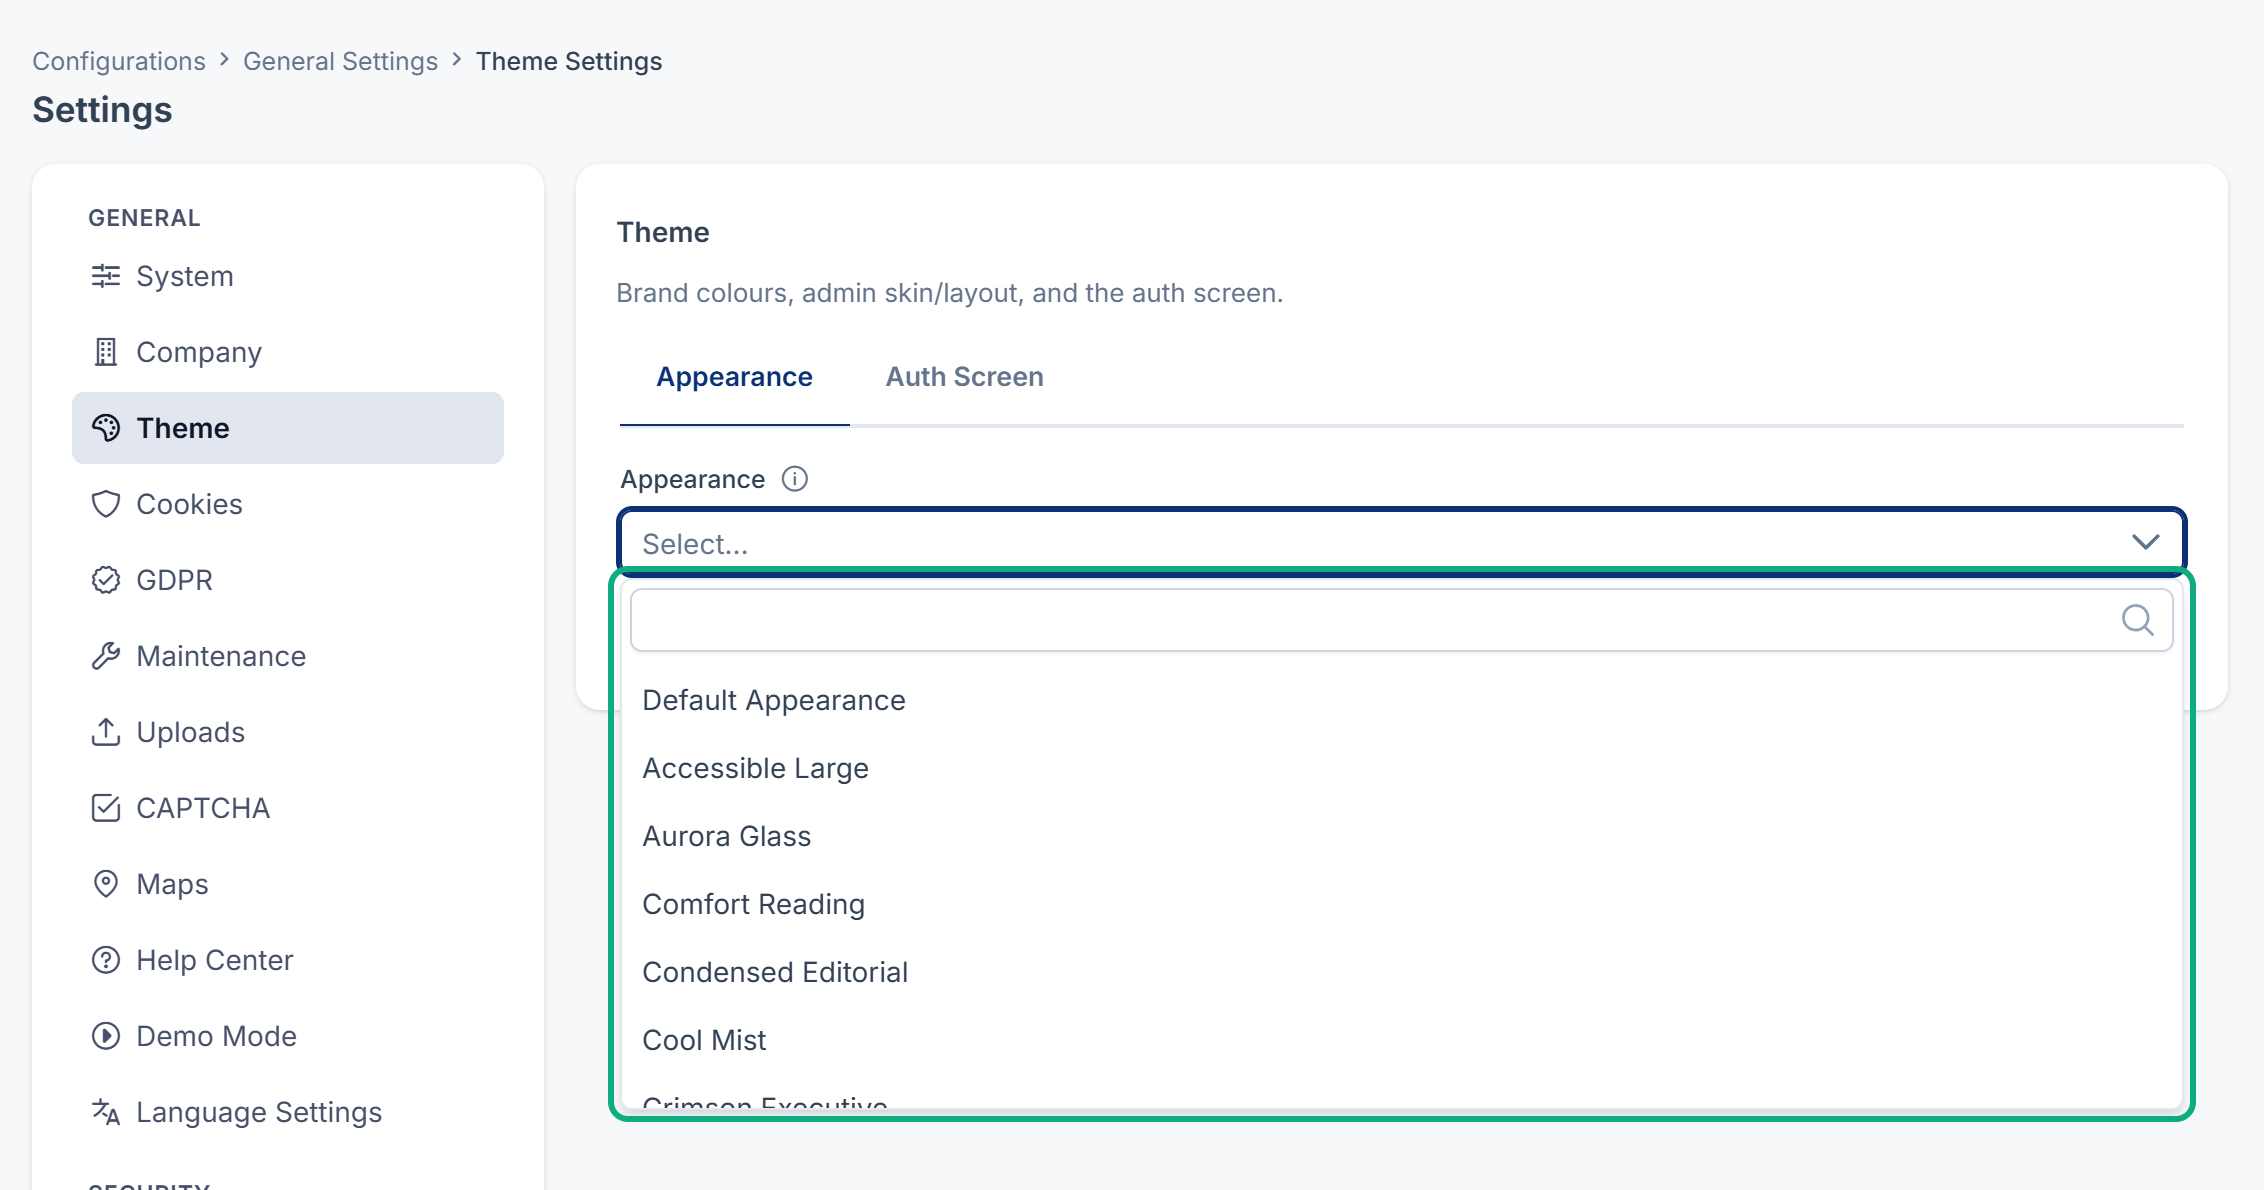
On the Appearance tab, choose your appearance in Appearance.
-
Select Save changes.
This is the look the admin uses when nothing else chooses one. An experience can name its own appearance, and that wins for people in it. A person's own choices in their profile, such as light or dark mode, win over both.
Style the sign-in screen
-
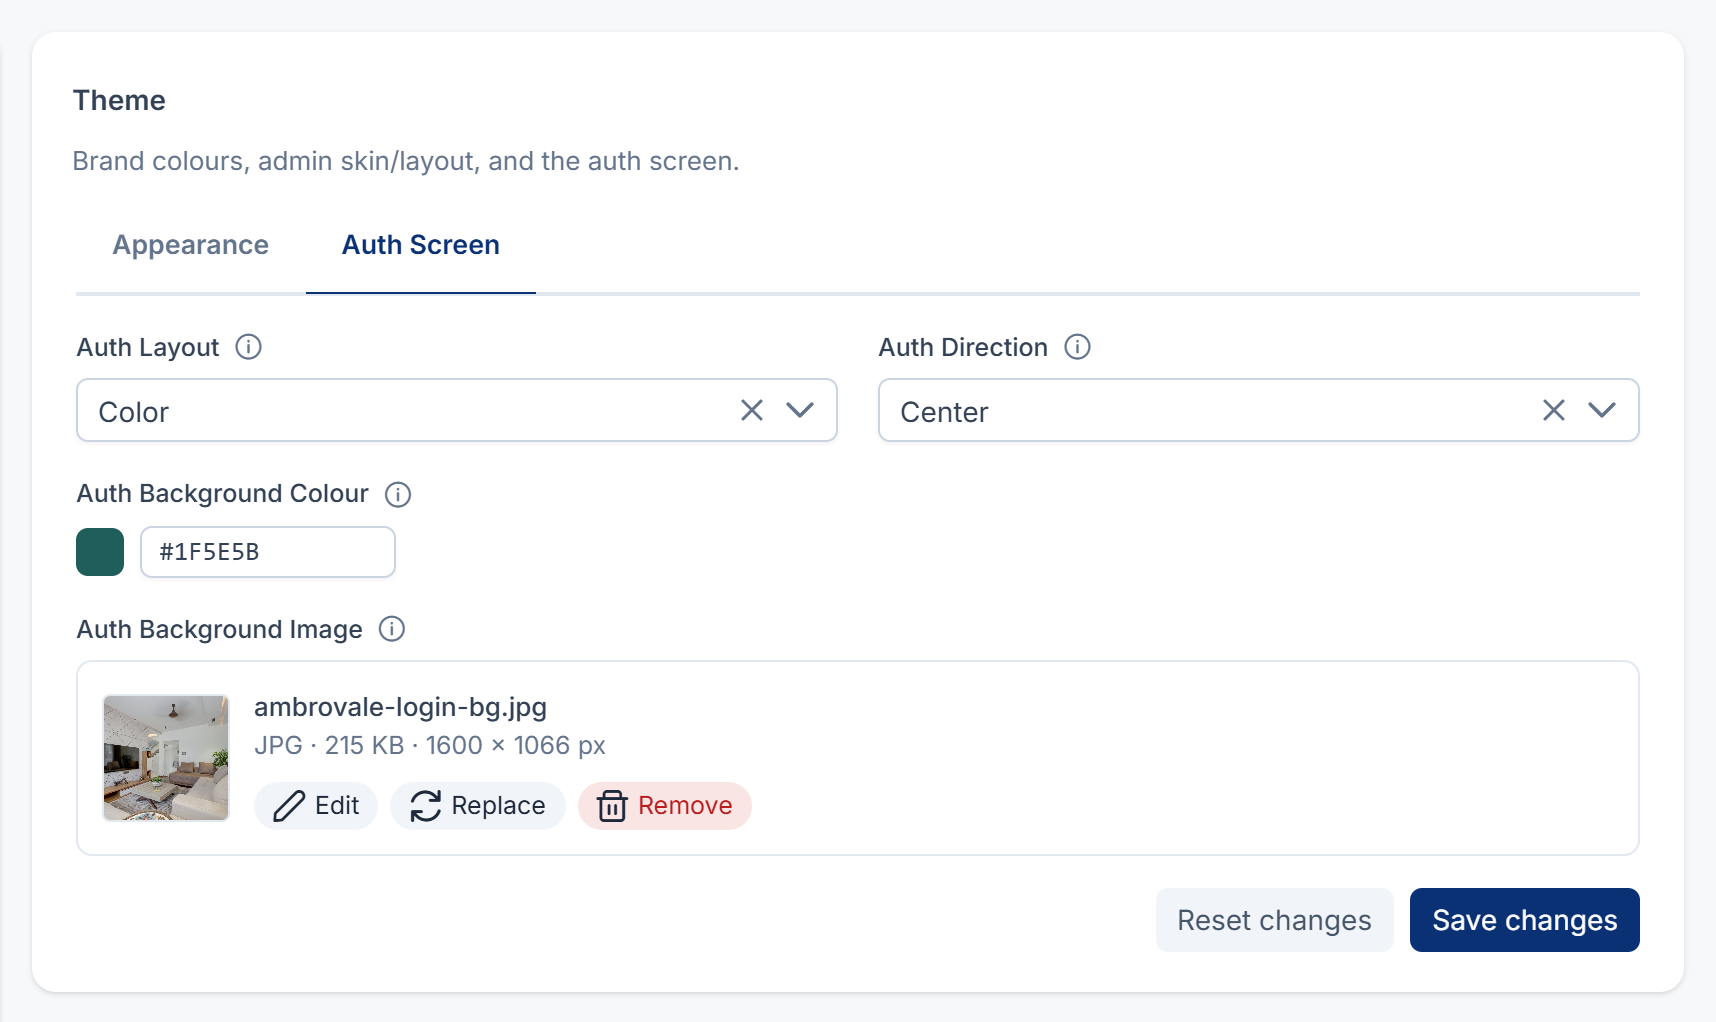
On the Theme panel, open the Auth Screen tab.
-
Choose an Auth Layout: Color, Image or Slider.
-
Choose an Auth Direction: Center, Left or Right. This sets where the sign-in form sits.
-
Set an Auth Background Colour, or upload an Auth Background Image.
-
Select Save changes.
Slider needs the form on one side, so it works only with Left or Right. With Center it falls back to the colour.
Defaults on a new installation
| Field | Default |
|---|---|
| Auth Layout | Color |
| Auth Direction | Center |
| Auth Background Colour | #0b3175 |
What happens next
Everyone who doesn't have an experience or personal choice of their own now sees your appearance. To change an appearance later, open it from Configurations › Appearances and select Edit.
Thanks. That helps us decide what to write next.
Thanks for telling us what was missing.
You already answered for this article today. Thanks.
We got a lot of answers from your network just now. Try again in a few minutes.
We couldn't send that. Check your connection and try again.
Links in this article
Printed from help.bsscn.com. The online article may have changed since.