Set up your SEO defaults
Give your site its name, address and title pattern, a default description and share image, choose whether search engines may index it, and add your Google and Bing verification codes.
- Applies to
- SEO 1.1 and later
- Who can do this
- Platform owner, Administrator
- Permission
feature.seo. setting.edit - Where
- SEO › SEO Settings
On this page
The SEO defaults fill the gaps for every page that has no details of its own, so no page goes out without a title, description or share image. A page's own details always win. Set these up first, before you work on single pages.
Before you start
- You need Edit Setting (
feature.) in the SEO Configuration group. With only View Setting (seo. setting.edit feature.), the panel opens read-only.seo. setting.view - Have your website's address ready, and a share image of 1200 x 630 pixels.
Steps
-
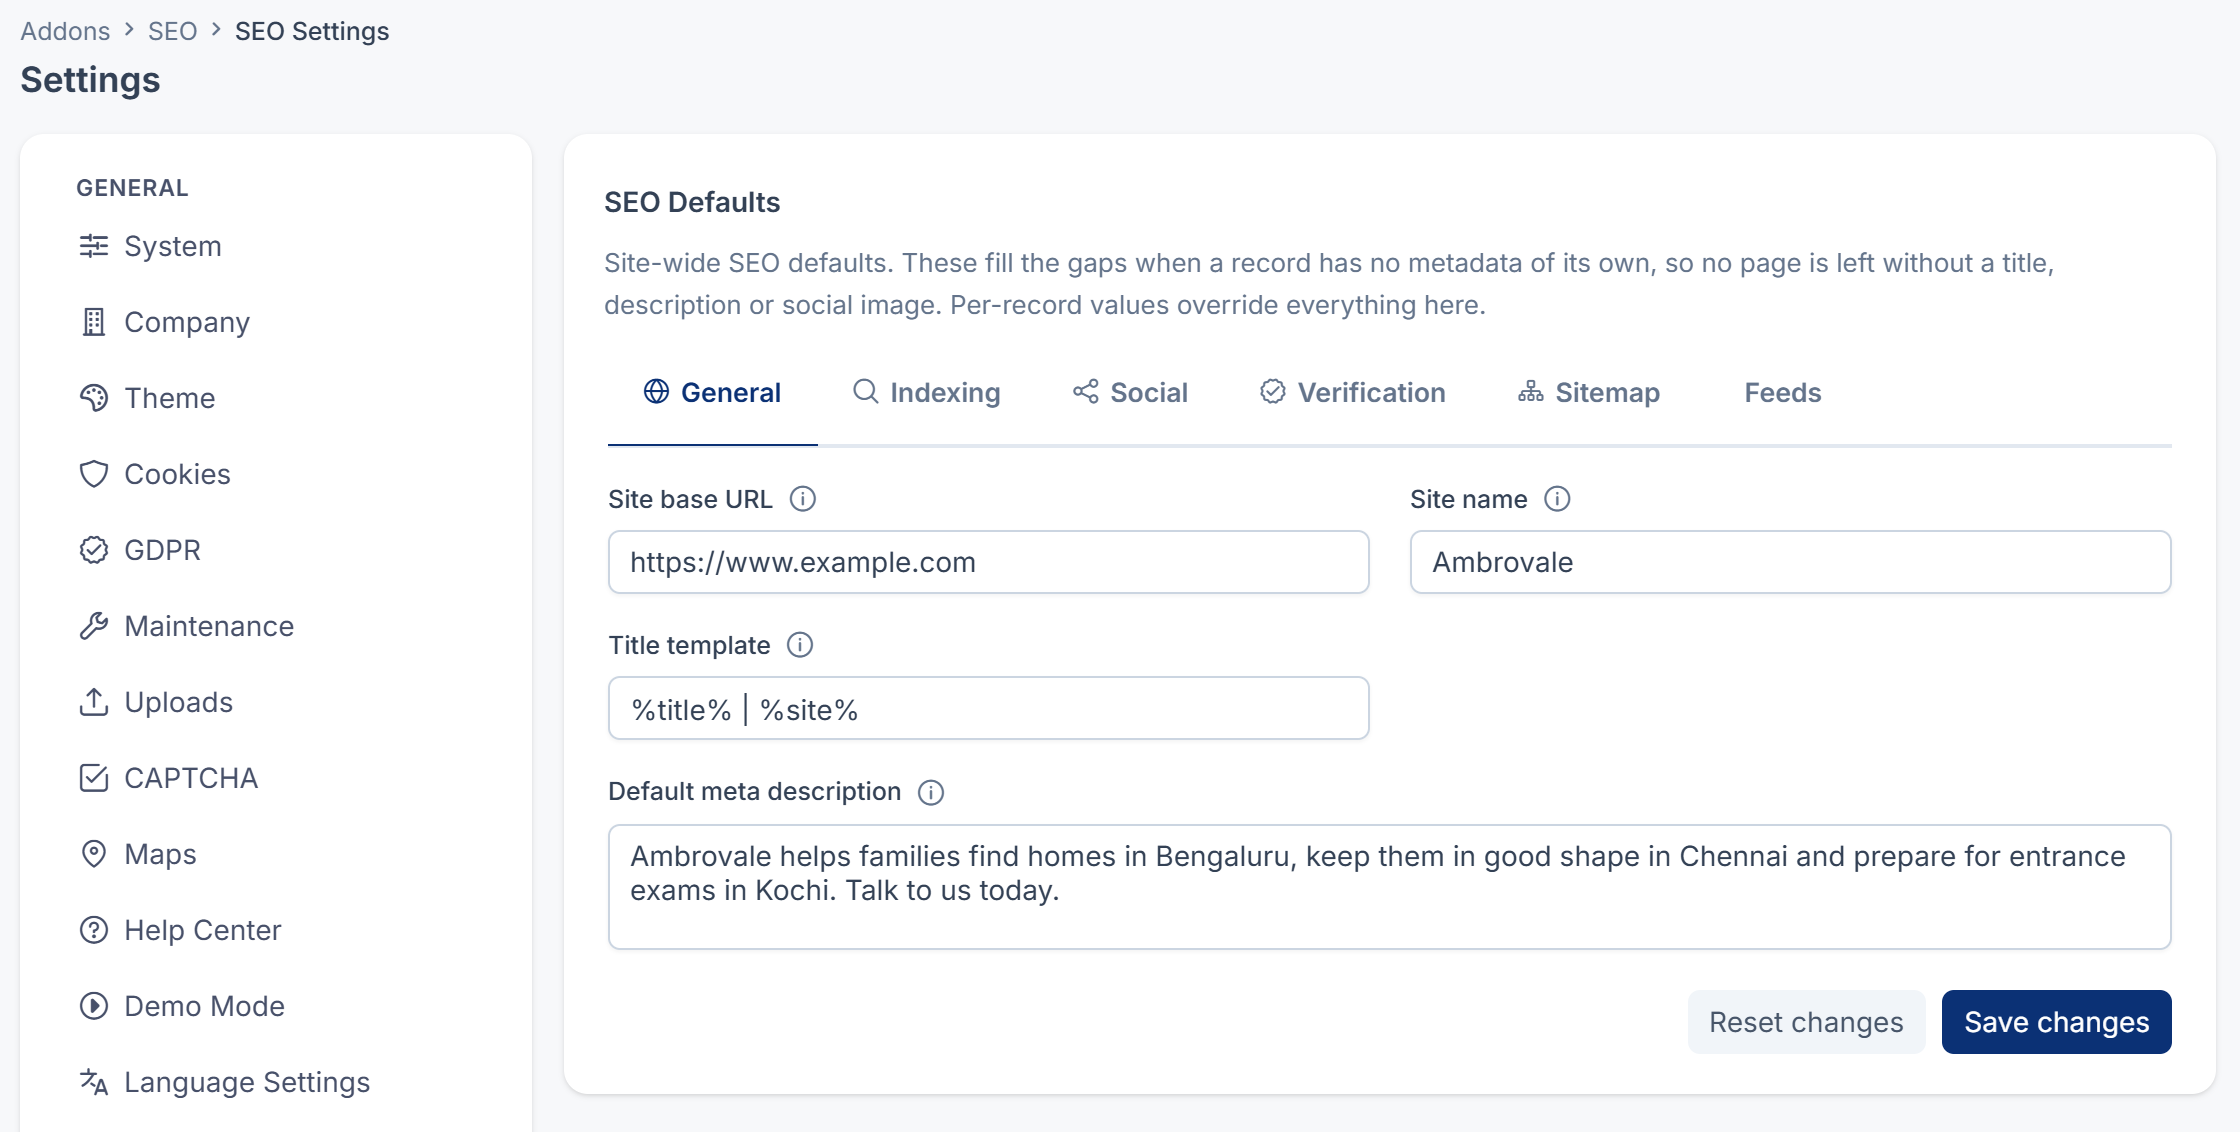
In the sidebar, open SEO › SEO Settings. The Settings hub opens on the SEO Defaults panel, under SEO.
-
On the General tab, fill in:
- Site base URL: your public website's address, for example
https://www.example.com. - Site name: your site's name, as you want it in titles.
- Title template: how page titles are built.
%title%is the page's title and%site%the site name, for example%title% | %site%. - Default meta description: one or two sentences about your site, about 150 to 160 characters.
- Site base URL: your public website's address, for example
-
Open the Indexing tab. For a live site, make sure Default indexing is on Index and Default link following is on Follow. Until this panel is first saved, both switches show off, and saving them that way tells search engines not to index any page without SEO details of its own. See Your pages don't show in search results.

-
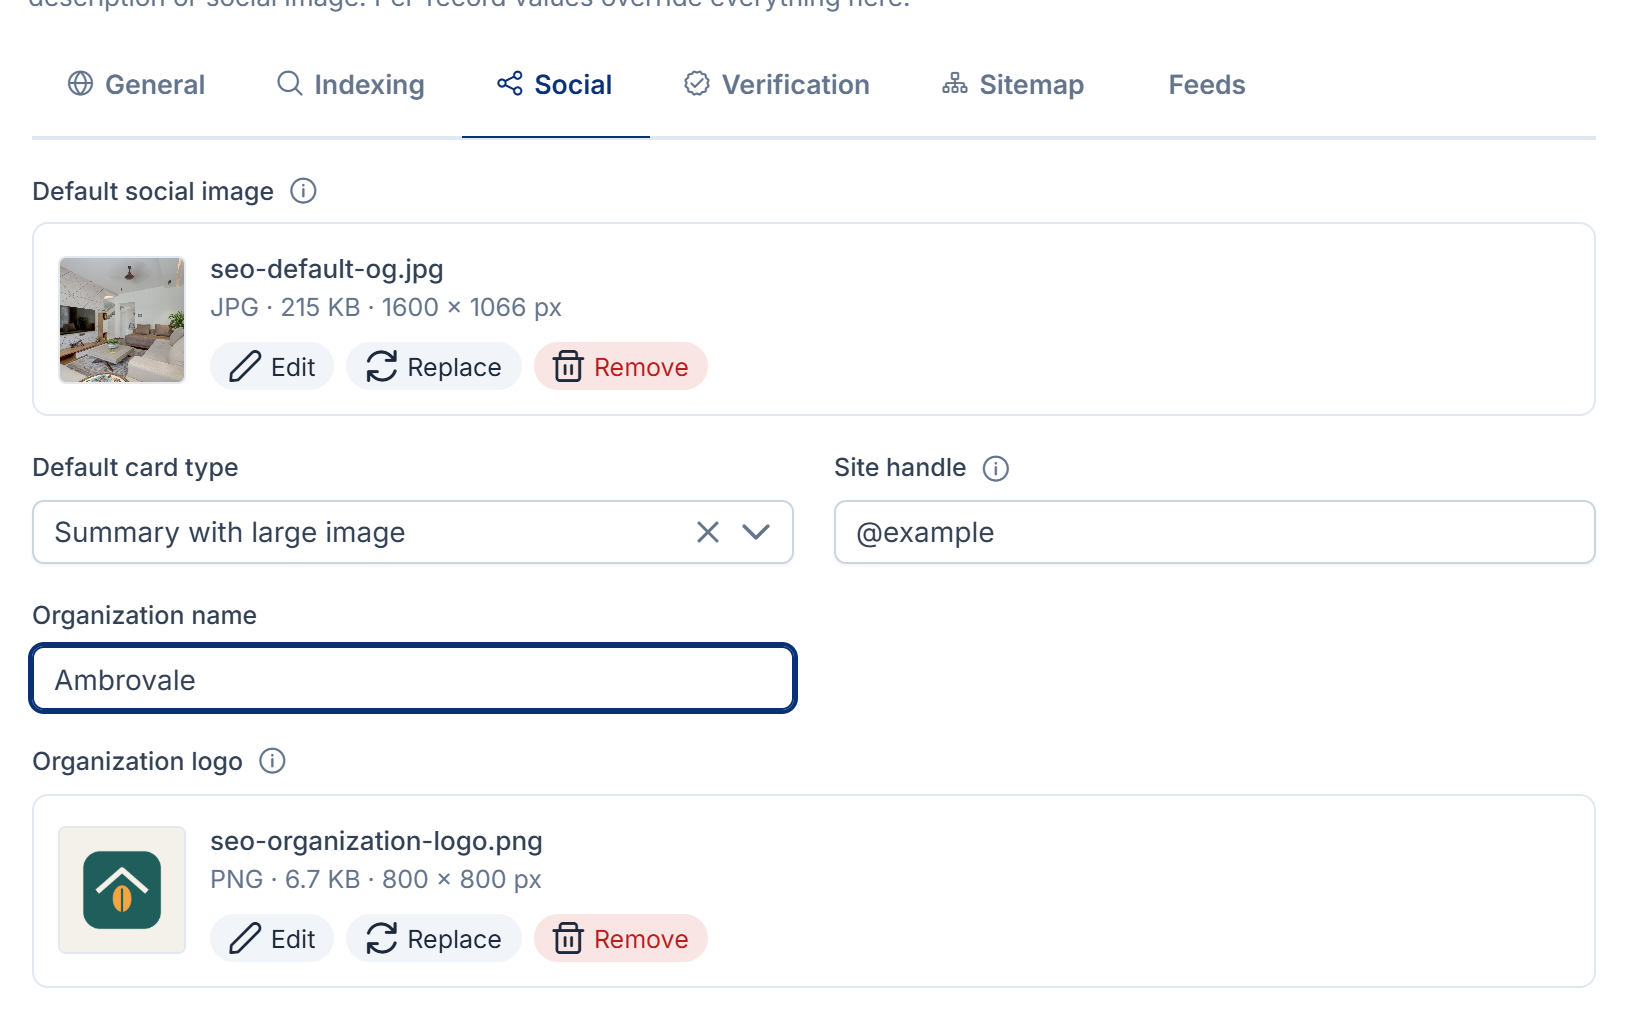
Open the Social tab, and fill in:
- Default social image: the picture shown when a page with no image of its own is shared.
- Default card type: Summary with large image shows the picture large on X. Summary shows it small. Choose one: left empty, no card type is saved.
- Site handle: your site's X handle, with the
@, for example@example. - Organization name and Organization logo: your business's name and logo, which search engines may show beside your results.
-
Open the Verification tab. Paste the code from Google Search Console and from Bing Webmaster Tools. Paste only the code, not the whole tag they give you.
-
Select Save changes.
You see Settings saved. The Sitemap and Feeds tabs can stay as they are. See How your sitemap and feeds are built.
Careful: Default indexing set to No index doesn't hide your whole site. It only covers pages that have never been saved with SEO details. Every page saved with its SEO section keeps its own Search indexing, which starts at Indexed, and the sitemap still lists it. In SEO 1.2.0, there's no single switch that keeps a staging site out of search. Set Search indexing to Not indexed on each page, or block search engines on the staging website itself.
What happens next
- Your website reads the new defaults the next time it asks your Laramin. It may keep a copy for a while.
- Search console codes only work if your website puts them into its pages. Check in Google Search Console or Bing Webmaster Tools that your site is verified.
- To give a page its own title, description or image, see Set a page's search and share details.
Thanks. That helps us decide what to write next.
Thanks for telling us what was missing.
You already answered for this article today. Thanks.
We got a lot of answers from your network just now. Try again in a few minutes.
We couldn't send that. Check your connection and try again.
Links in this article
Printed from help.bsscn.com. The online article may have changed since.