Set up your blog
Tell Blog where your website lives and how article addresses start, then add the authors, categories and tags your writers will choose from.
- Applies to
- Blog 2.3 and later
- Who can do this
- Platform owner, Administrator
- Permission
feature.blog. setting.edit - Where
- Settings hub › Blog › Blog URLs, then Blog › Authors, Categories and Tags
On this page
Before anyone writes, set your website's address and add the authors and categories articles need. An article can't be saved without a category and an author.
Before you start
- For the addresses, you need Edit Setting (
feature.) in the Blog Content group. With only View Setting, the panel opens read-only.blog. setting.edit - For the rest, you need Create Author, Create Category and Create Tag (
feature.,blog. author. create feature.,blog. category. create feature.) in the Blog Taxonomy group.blog. tag. create - Have your public website's address ready, for example
https://www.example.com.
1. Set where articles live
-
Open the Settings hub, for example from Configurations › General Settings › System Settings.
-
In the panel list, under Blog, select Blog URLs.
-
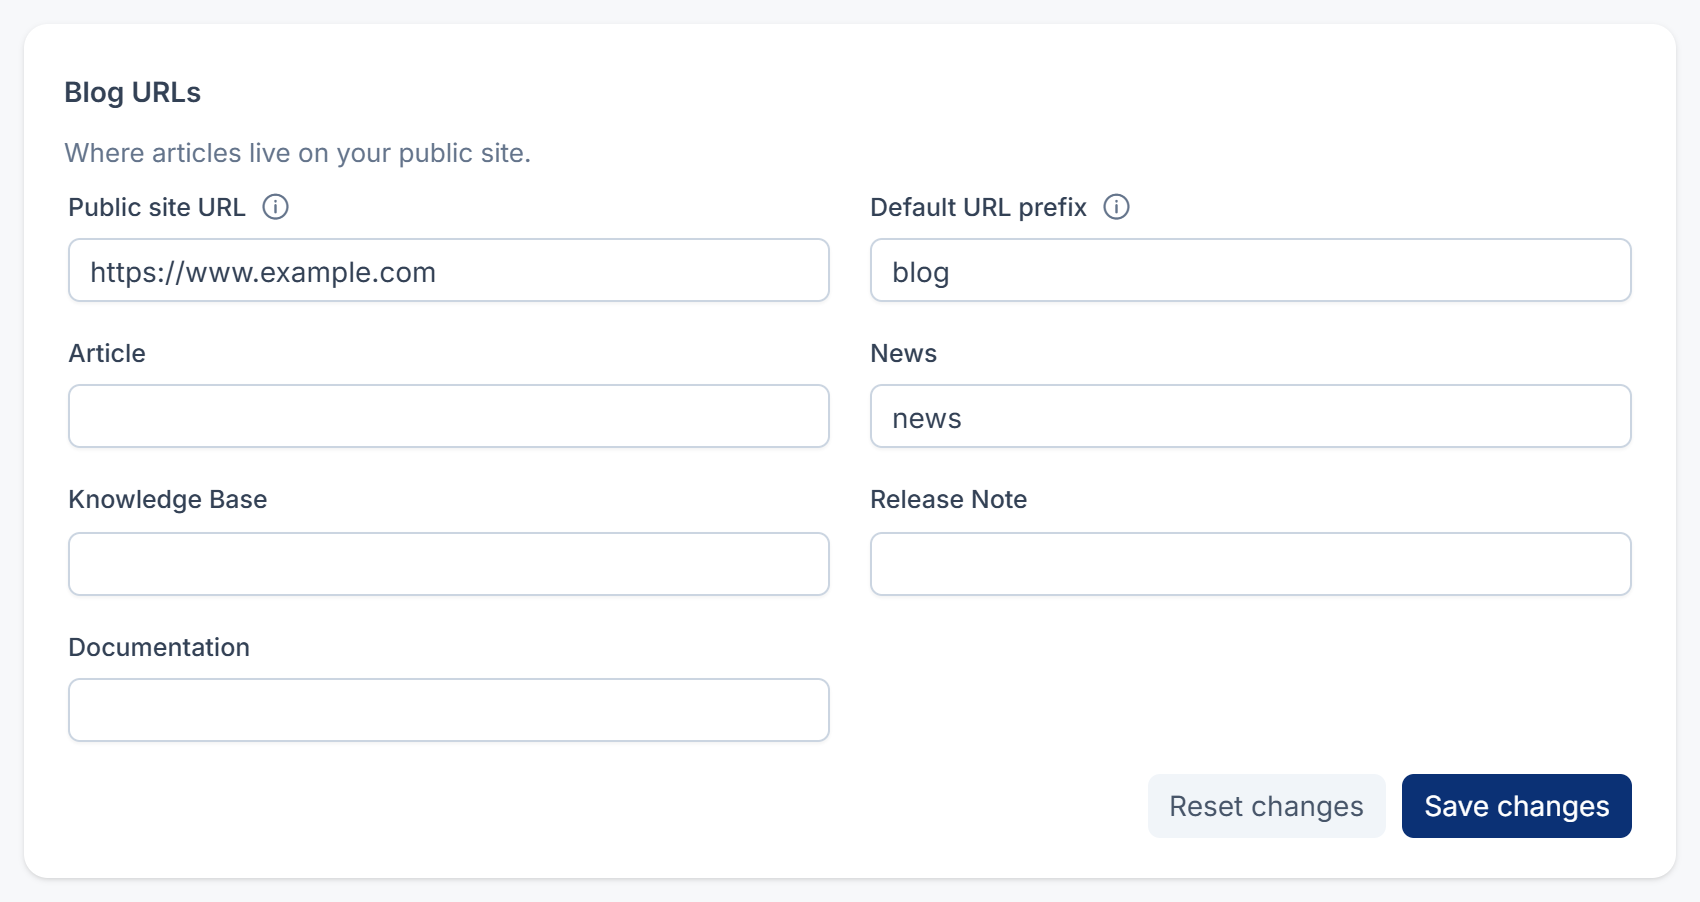
In Public site URL, enter your website's address, for example
https://www.example.com. This is usually not the address of your Laramin. -
In Default URL prefix, enter the part of the address before an article's slug, for example
blog. Left empty, it'sblog. -
To give a content type its own prefix, fill in its field: Article, News, Knowledge Base, Release Note or Documentation. For example,
newsfor News. Types left empty use the default prefix. -
Select Save changes.
You see Settings saved. Prefixes may use lowercase letters, numbers, - and /.
Careful: Changing a prefix later moves every published article of that type to a new address, and Blog adds no redirects for it. Set the prefixes before you publish, or add redirects in SEO yourself. See Add a redirect.
2. Add authors
-
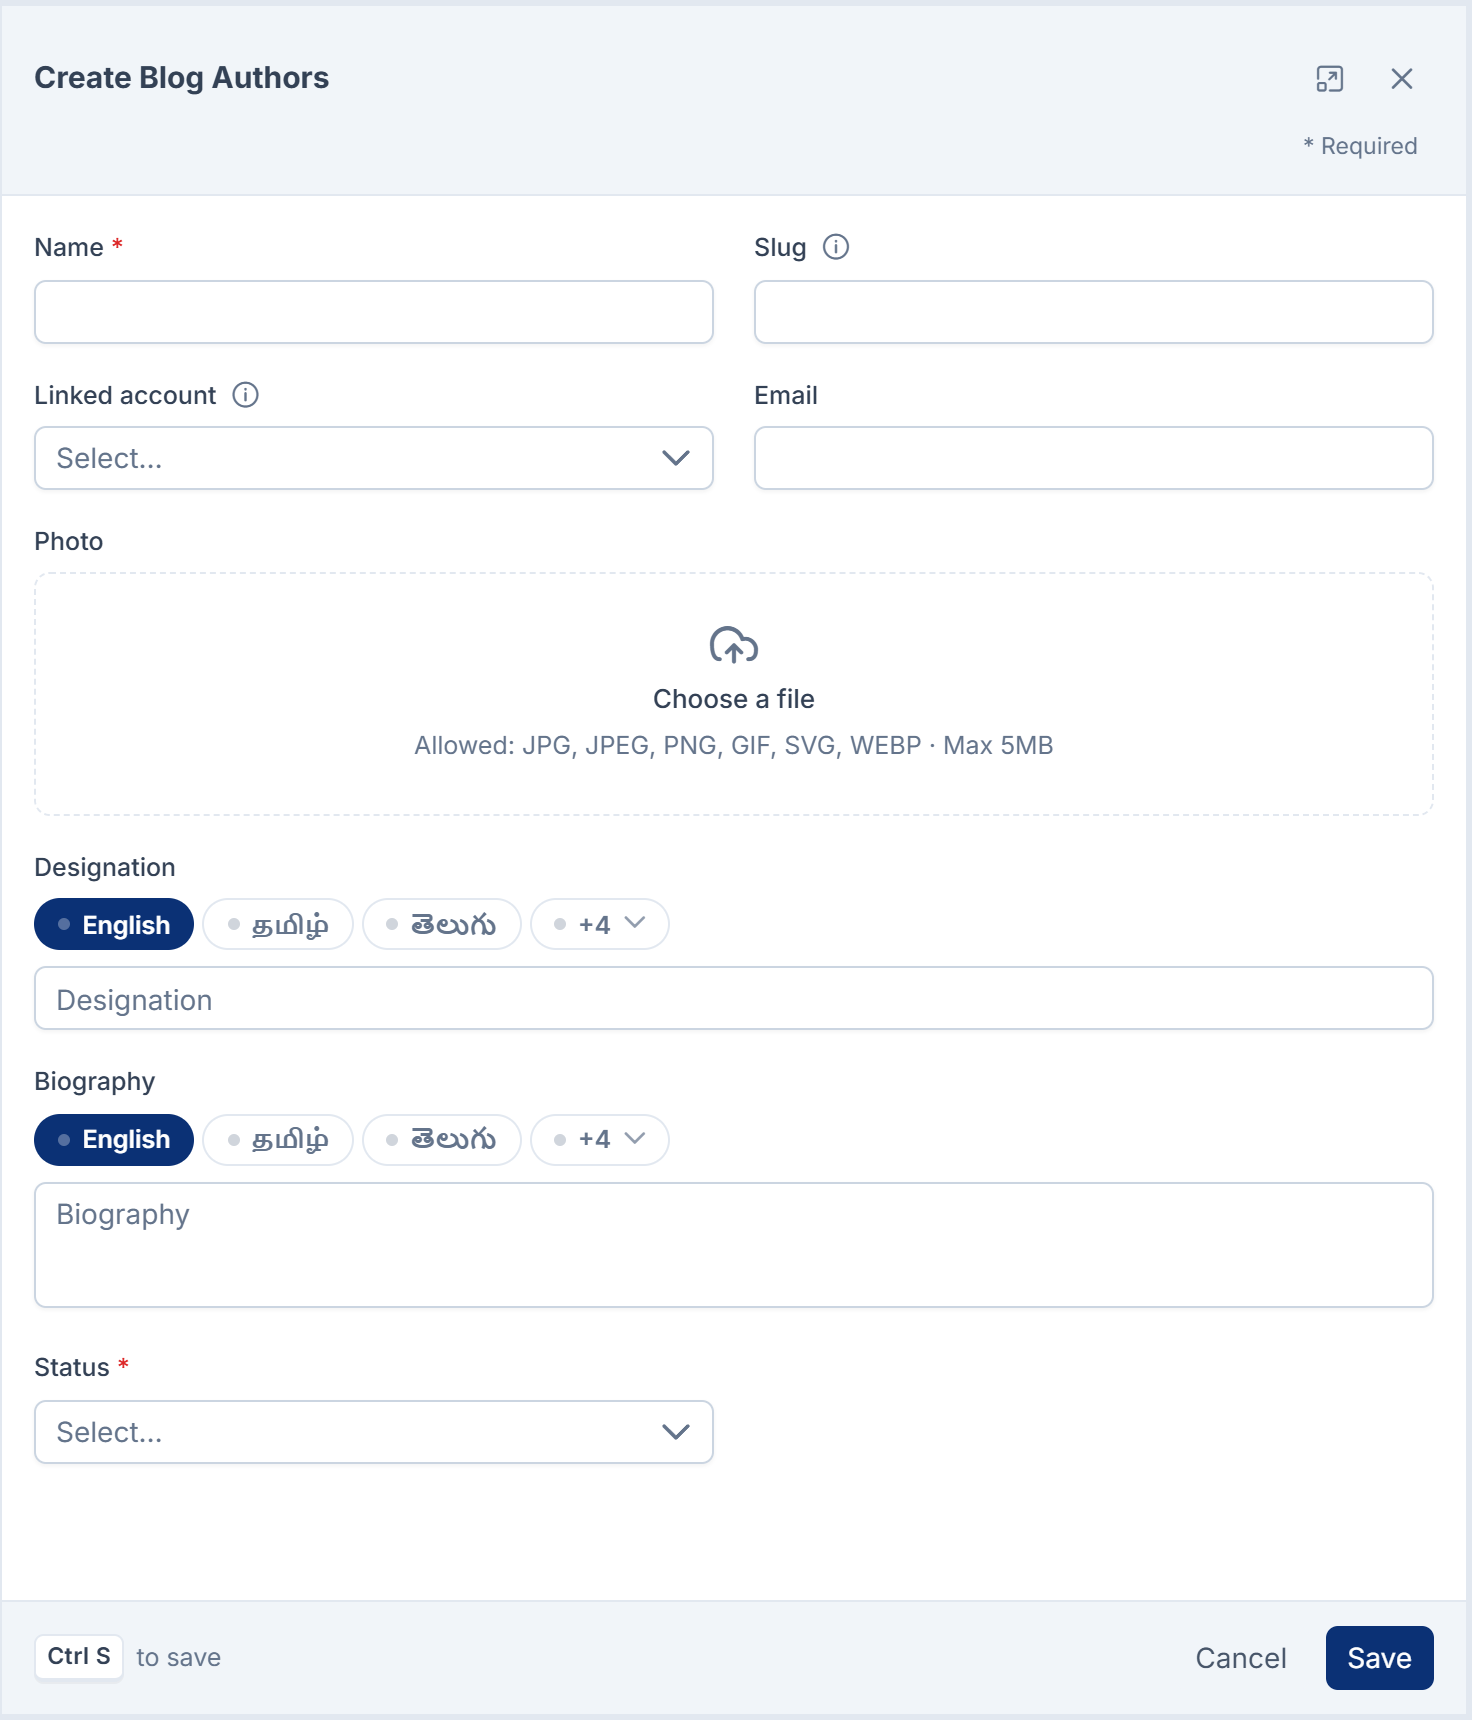
Open Blog › Authors and select New Blog Authors.
-
Fill in Name. Leave Slug empty to build it from the name.
-
In Linked account, pick the person's account in your Laramin, or leave it empty for a guest author who has no account. Each account can be linked to one author only.
-
Add a Photo, Designation and Biography if your website shows them. Email is for your team only and is never published.
-
Leave Status on Active, then save.
You see Author created.
3. Add categories
-
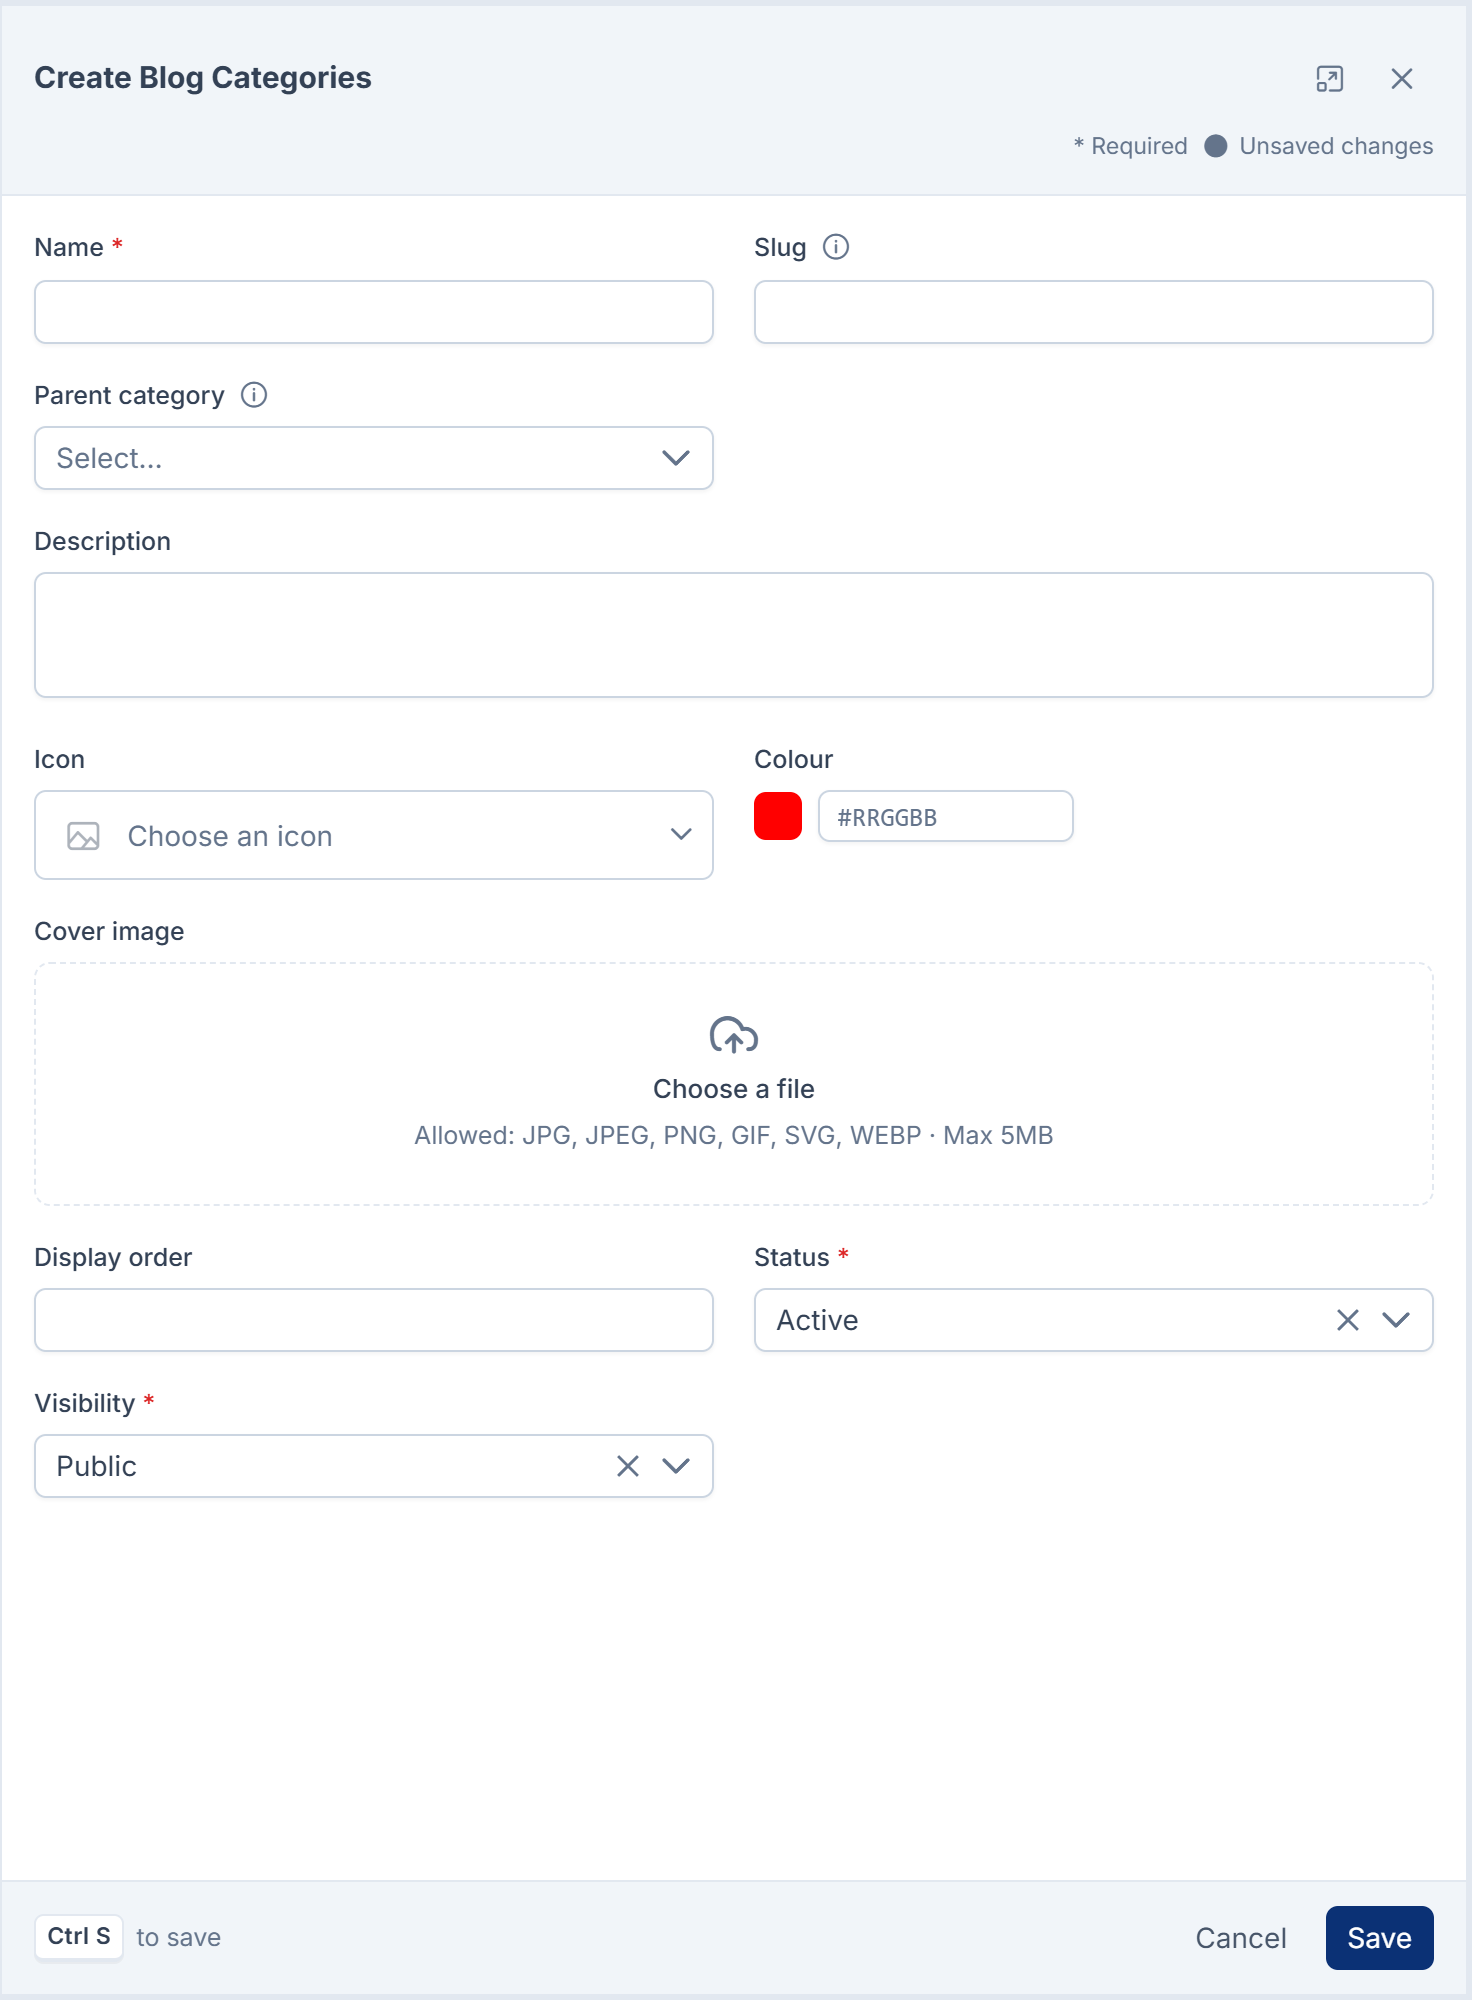
Open Blog › Categories and select New Blog Categories.
-
Fill in Name. Leave Slug empty to build it from the name.
-
To put the category inside another one, choose it in Parent category. Leave it empty for a top-level category.
-
Optionally add a Description, Icon, Colour and Cover image for your website to use.
-
In Display order, lower numbers come first within the same level.
-
Leave Status on Active and Visibility on Public, then save.
You see Category created.
4. Add tags
-
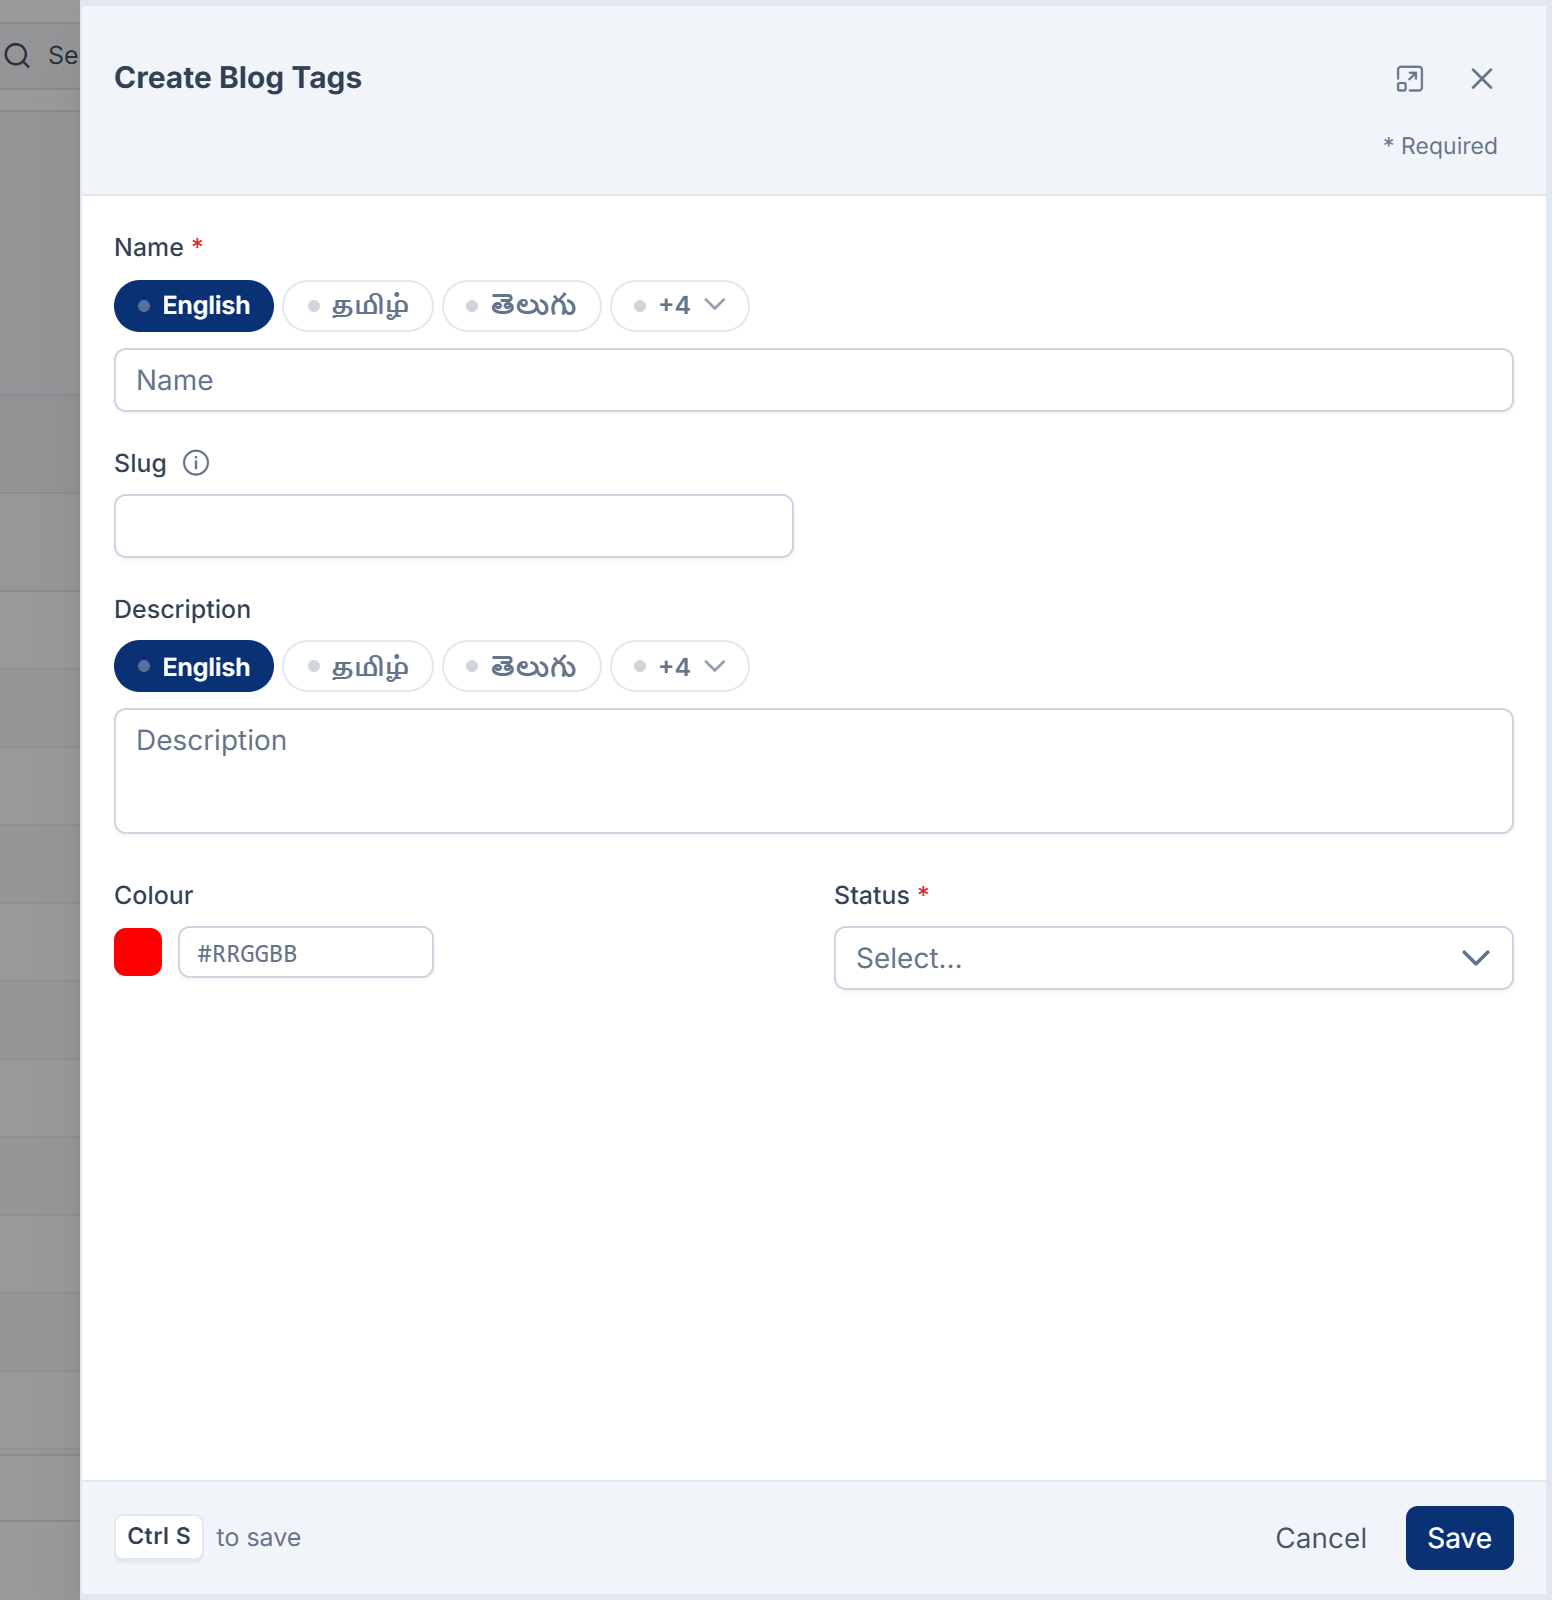
Open Blog › Tags and select New Blog Tags.
-
Fill in Name, and optionally a Description and Colour. Leave Slug empty to build it from the name.
-
Save. You see Tag created.
People with Create Tag can also add a tag by typing it into Tags on an article's form.
What happens next
- Writers can now pick these when they write an article.
- With more than one language turned on, translate category and tag names, and author biographies, so your website shows them in each language.
- Inactive categories, tags and authors keep their articles, but your website no longer lists them. An inactive tag isn't offered on the article form either.
- A category or author with articles can't be deleted: Laramin says Move or remove the 2 articles filed under this category first. or Reassign the 2 articles written by this author first. A category with sub-categories can't be deleted until they're moved. To delete or restore several at once, see Delete, restore and act on records in bulk.
- A deleted category, tag or author keeps its slug, so an old link never starts pointing at something else.
Thanks. That helps us decide what to write next.
Thanks for telling us what was missing.
You already answered for this article today. Thanks.
We got a lot of answers from your network just now. Try again in a few minutes.
We couldn't send that. Check your connection and try again.
Links in this article
Printed from help.bsscn.com. The online article may have changed since.