Schedule backups to cloud storage
Connect Amazon S3 or another S3-compatible store, an SFTP server or an FTP server, test the connection, and set Laramin to back up on its own every hour, day, week or month.
Why this step
Backups kept on your server are lost with it. A copy in a Backup destination: The place outside your server where backup copies are kept. lets you recover.
Have ready: your storage provider's details.
Don't have Backup? Install it first: Upload and install an add-on.
Today you only need:
- Applies to
- Backup 1.1 and later
- Who can do this
- Platform owner
- Permission
feature.backup. settings.edit - Where
- Backups › Storage Destinations
Before you start
- You need Edit Settings (
feature.) for the Backup module. Super admins have it.backup. settings.edit - Scheduled backups run with your Laramin's scheduled jobs, so your server needs the cron job that runs every minute. Developer Tools › Scheduler shows when each job last ran. If they don't run, see Scheduled jobs don't run.
- Have the details of your storage ready:
- Amazon S3, Wasabi or MinIO: an access key and secret key that may write to the bucket, the bucket name and its region. For a service other than Amazon S3, also its endpoint address.
- SFTP or FTP server: the host name, a user name and password, and the folder to store backups in.
Tip: Create a separate bucket, or a separate user, just for backups. Give it permission to write files and nothing else it doesn't need.
Steps
1. Enter the storage details
-
In the sidebar, open Backups › Storage Destinations.
-
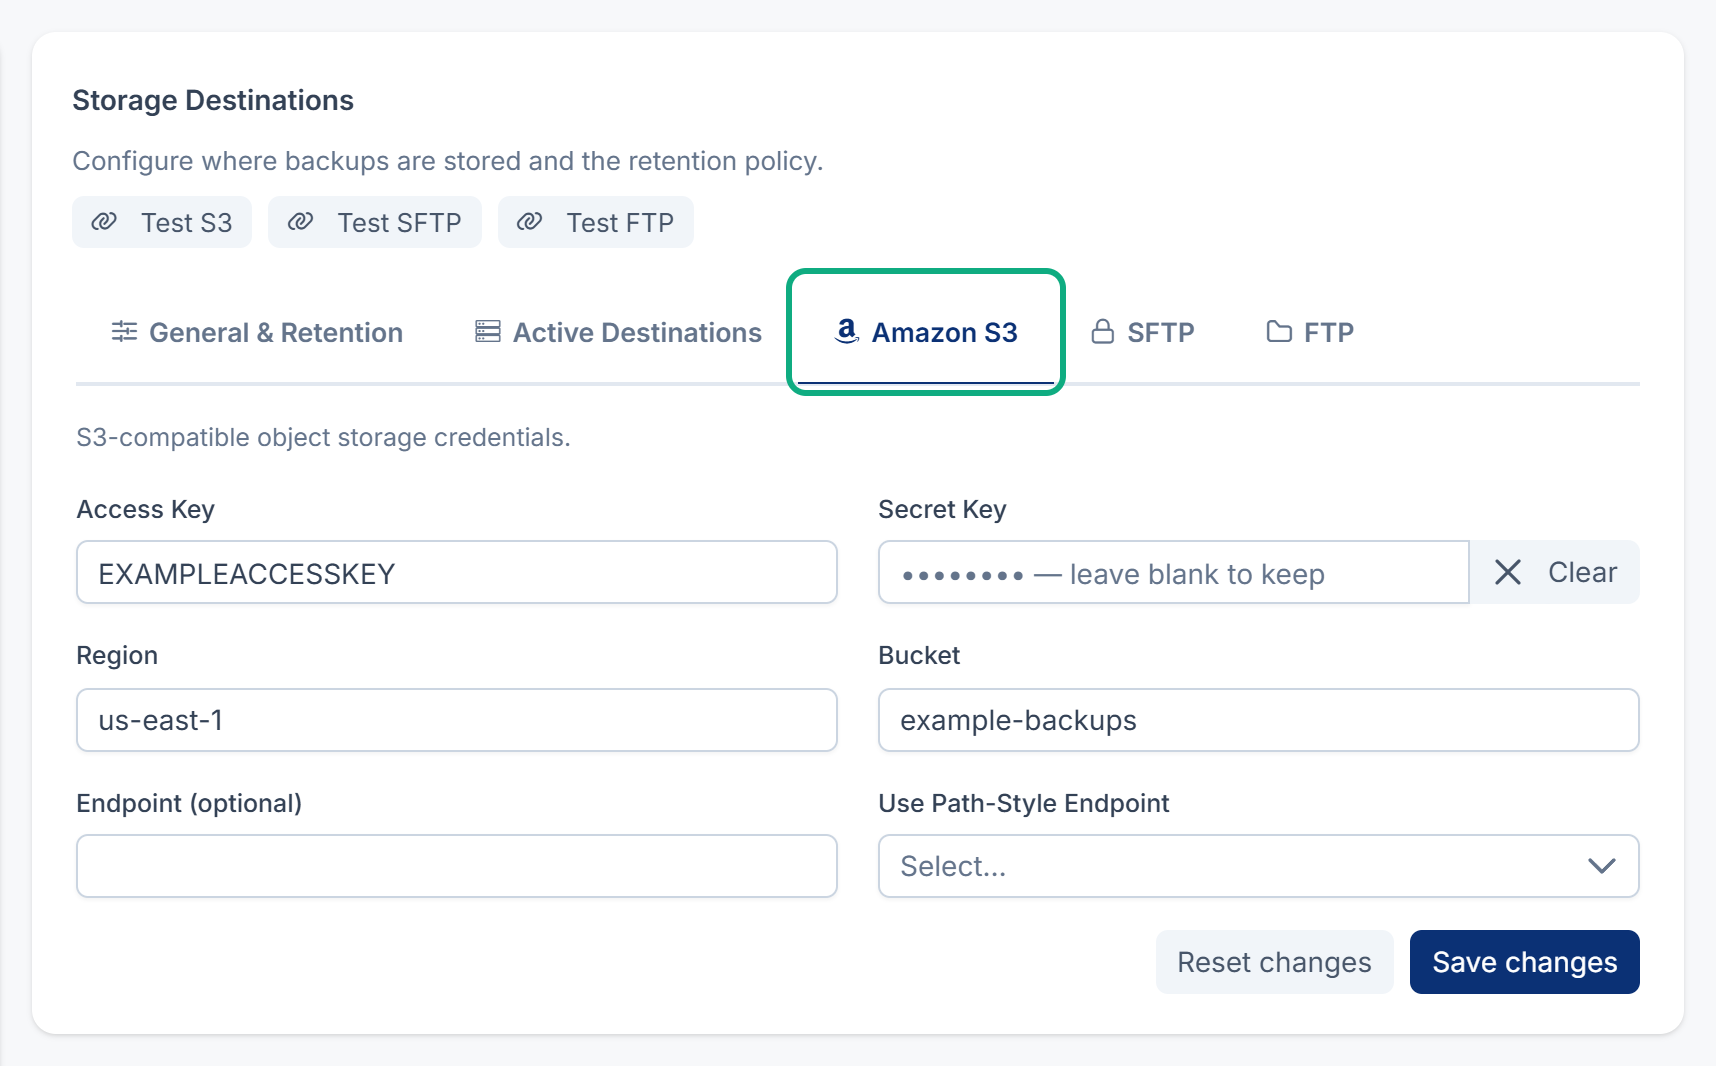
Open the tab for your storage: Amazon S3, SFTP or FTP.
-
Fill in the fields. For example, for an S3-compatible store:
- Access Key: the key from your storage provider, for example
EXAMPLEACCESSKEY. - Secret Key: its secret.
- Region: for example
us-east-1. If you leave it empty, Laramin usesus-east-1. - Bucket: for example
example-backups. - Endpoint (optional): leave it empty for Amazon S3. For another service, enter its address, for example
https://s3.example.com. - Use Path-Style Endpoint: set it to Yes if your provider asks for path-style addresses. MinIO usually does.
For an SFTP or FTP server, fill in Host (for example
backup.), Username, Password, Port and Root Path (for exampleexample.com /backups). If you leave Port empty, Laramin uses 22 for SFTP and 21 for FTP. If you leave Root Path empty, it uses/. - Access Key: the key from your storage provider, for example
-
Select Save changes.
Careful: FTP sends your password and your backups over the network without encryption. Use SFTP or S3 if you can.
2. Test the connection
-
Select Test S3, Test SFTP or Test FTP above the tabs.
-
Wait for the result. Laramin writes a small test file to your storage, then deletes it.
You see Connection to S3 succeeded., or the same for SFTP or FTP. If you see Missing required credentials for S3. Save them first., save the tab before you test. If you see Connection failed: followed by a reason, check the details and try again.
The test always uses the details you last saved, not what is typed on screen.
3. Turn the destination on
-
Open the Active Destinations tab.
-
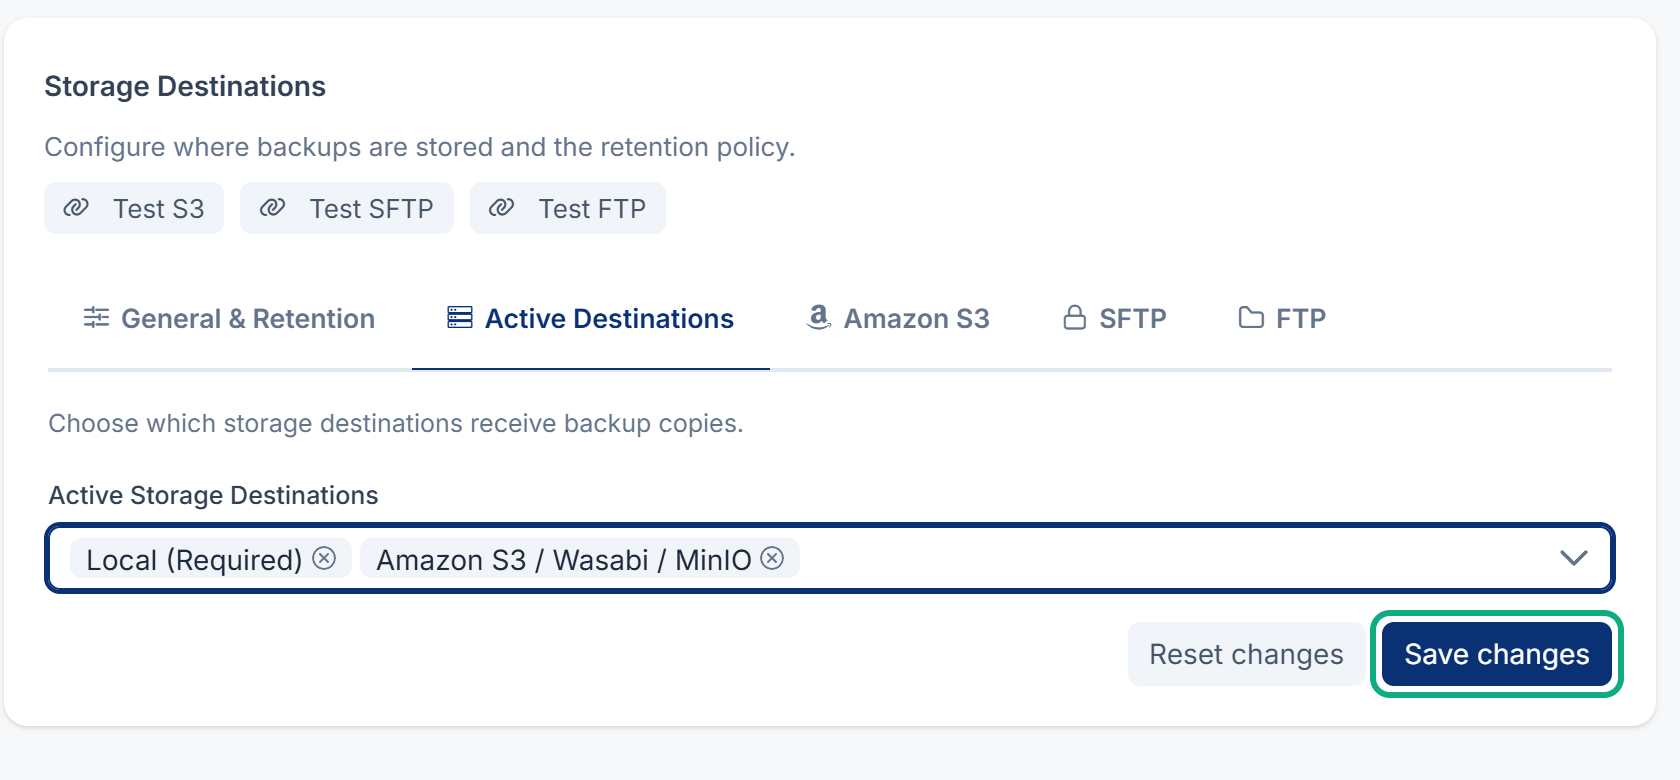
In Active Storage Destinations, add your storage: Amazon S3 / Wasabi / MinIO, SFTP or FTP. Leave Local (Required) in the list.
-
Select Save changes.
If the destination's required details are missing, Laramin refuses with Cannot activate S3 backups — enter its required credentials first (or use Test Connection to verify them). S3 needs an access key, a secret key and a bucket. SFTP and FTP need a host and a user name.
From now on, every backup is stored on your Laramin's server and then copied to each active destination.
4. Add a schedule
-
In the sidebar, open Backups › Schedules.
-
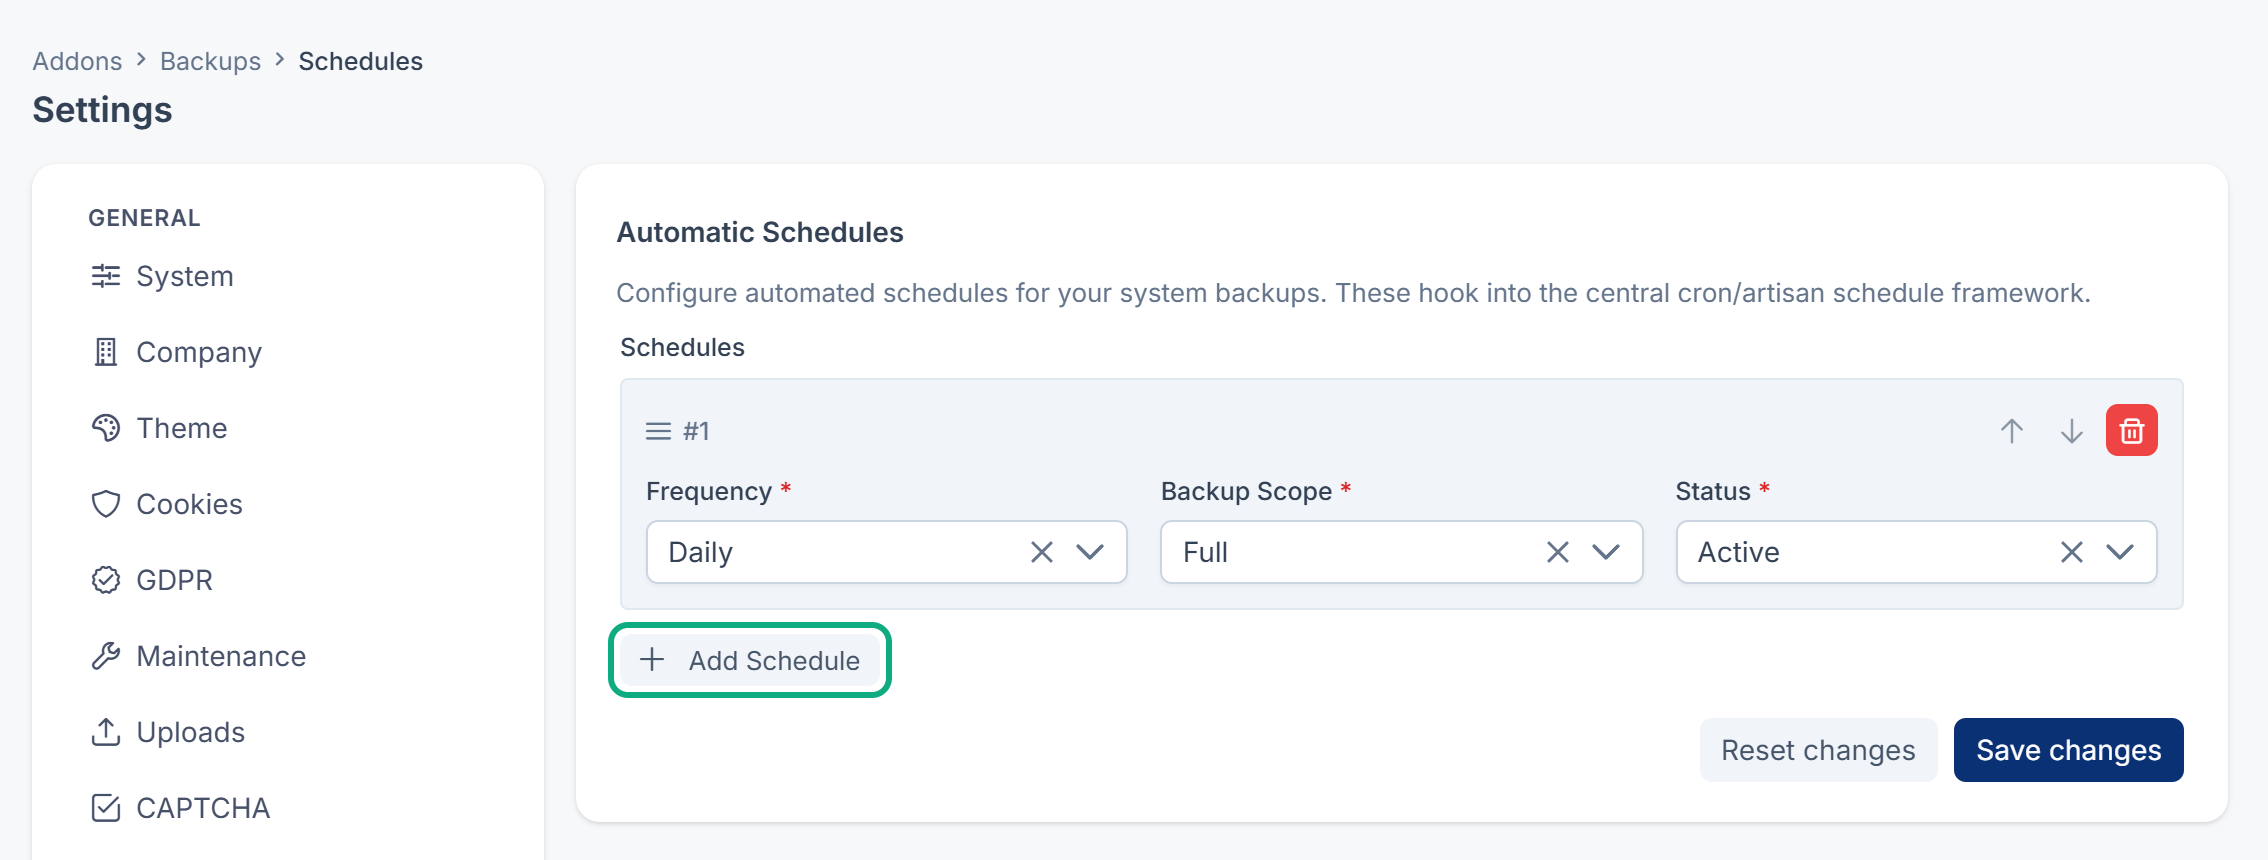
Select Add Schedule.
-
In Frequency, choose Hourly, Daily, Weekly or Monthly.
-
In Backup Scope, choose Full, Database, Files or Incremental. See Make a backup now and download it for what each one holds.
-
In Status, choose Active.
-
Select Save changes.
Scheduled backups run at the start of the hour (Hourly), at midnight (Daily), at midnight on Sunday (Weekly) or at midnight on the first day of the month (Monthly), in your Laramin's time zone.
Every Active schedule runs. You can add a Daily and a Weekly schedule with the same Backup Scope, or back up the Database more often than the Files. Two schedules with the same scope and the same frequency run once.
Every Minute (Testing) is only for checking that schedules work. Straight after your test, choose another frequency or set the schedule's Status to Disabled. Otherwise Laramin makes a backup every minute.
What happens next
-
Each scheduled backup appears on Backups › Backups History with the destinations it was copied to.
-
In your storage, backups are kept in a folder named after your Laramin's system name, inside the root path or bucket.
-
Old backups are deleted after each backup that ends Completed or Partial, from every destination, by the retention policy. Check that it keeps as many as you want. See Backup settings.
-
If the copy to a destination fails, or is skipped because its details are missing, the backup shows Partial. The copy on your Laramin's server is safe, and you can download or restore it as usual. Destinations lists only where the archive is, and the Problem column says which copy failed and why.
-
To pause a schedule, set its Status to Disabled and save.
Links in this article
Printed from help.bsscn.com. The online article may have changed since.