Set up Property CRM for your team
Get Property CRM ready before your team starts: check the business you're working in, give people their roles, and choose the codes, lead timing, alerts and dashboard your business uses.
- Applies to
- Property CRM 5.1 and later
- Who can do this
- Administrator
- Permission
feature.pcrm. setting.edit - Where
- Property CRM › Settings
On this page
Before you start
- Property CRM must be installed and turned on. It needs the Organization add-on, version 3.1 or later, which stores your clients. See Upload and install an add-on.
- You need Property CRM Admin, or a role with
feature.and the user permissions, or a super admin account.pcrm. setting.edit - Decide whether you want follow-ups, tasks and site visits. They come from the CRM and Activities add-ons. Property CRM works without them. See How Property CRM fits into Laramin.
Steps
1. Work in the right business
Every record belongs to the workspace it's created in.
- In the header, open Workspace and choose your business. Don't use All Workspaces: you can't add or change Property CRM records there. See Switch workspace.
2. Add your team
- Create a user for each person who doesn't have one yet. See Create a user.
- Add each person to the business's workspace. Someone who isn't a member can't be assigned inquiries, requirements or properties there. See Create a workspace.
- Give each person a Property CRM role. See Give people a Property CRM role.
3. Choose codes, lead timing and alerts
-
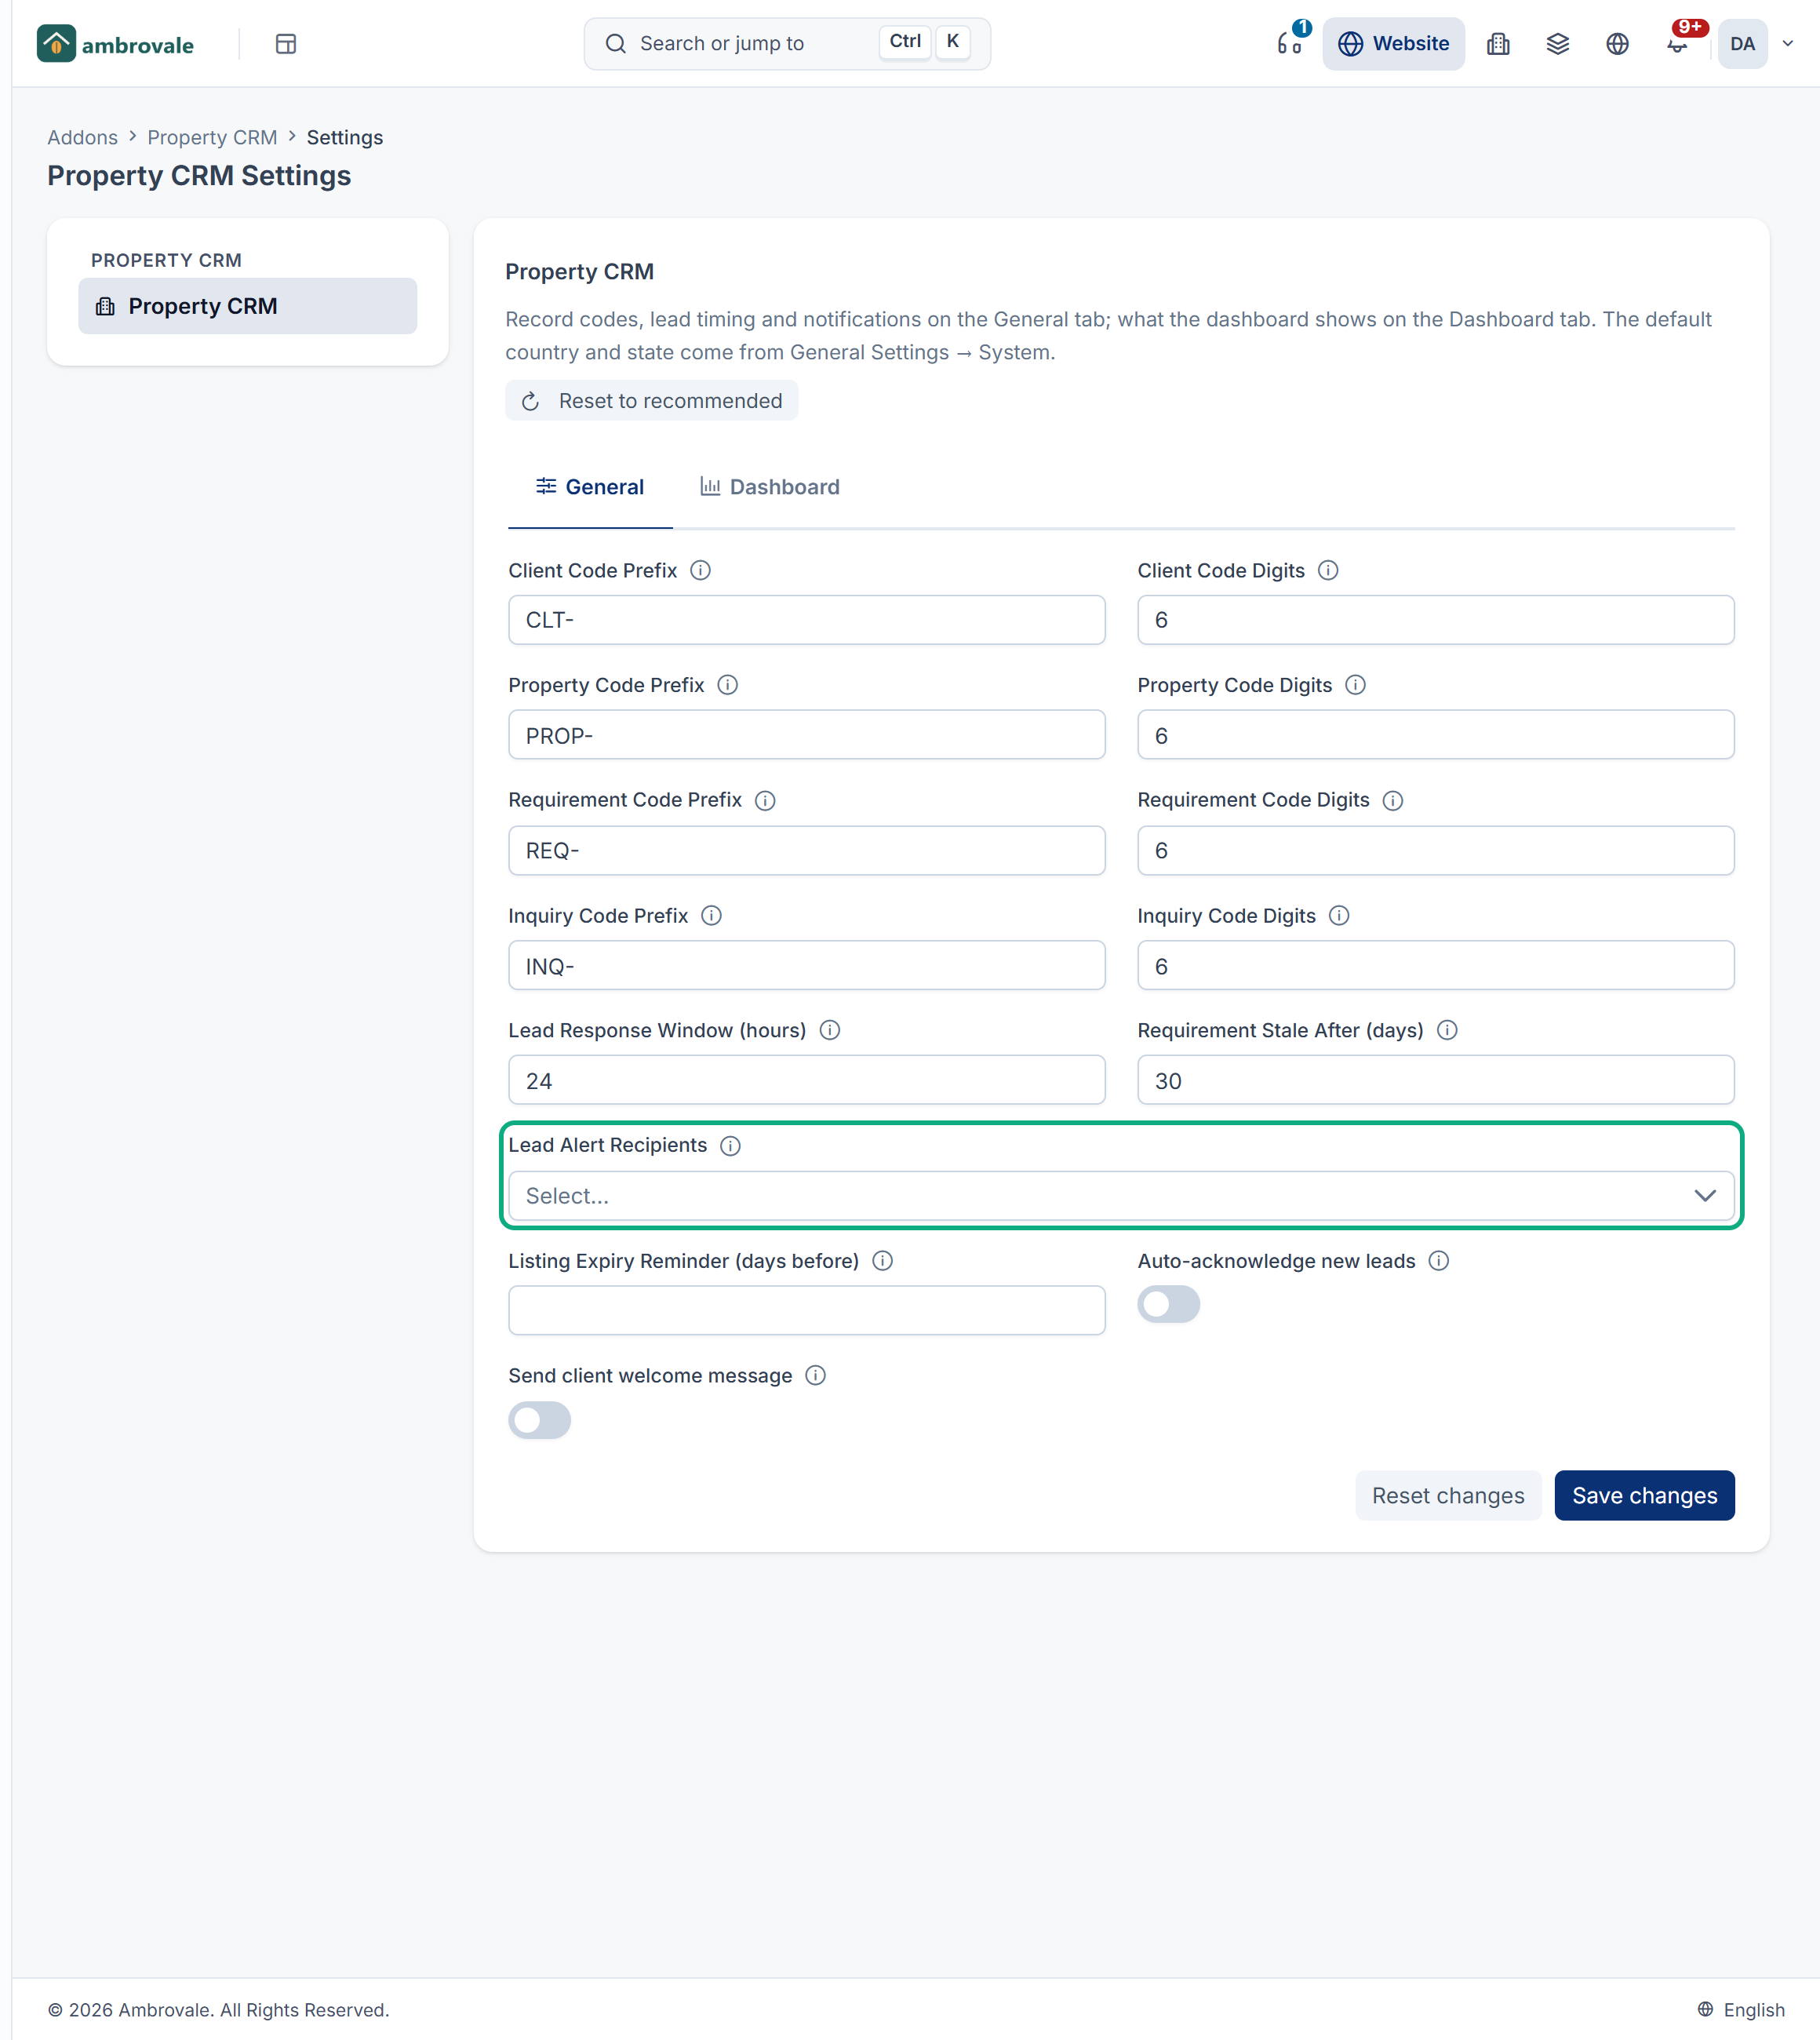
In the menu, open Property CRM › Settings. The Property CRM Settings screen opens on the General tab.
-
Check the code formats, for example Property Code Prefix
PROP-and Property Code Digits6. Change them now if your business uses its own: a change affects only records created afterwards. -
Set Lead Response Window (hours): how long a new inquiry may wait before the Inquiries list flags it as never contacted.
-
In Lead Alert Recipients, choose the people who should be told when a new inquiry arrives or an inquiry is converted. Leave it empty and nobody gets those alerts.
-
Turn on Auto-acknowledge new leads if each new lead should get an automatic reply. It's off at first.
-
Select Save changes.
Every field is explained in Property CRM settings.
4. Choose what the dashboard shows
-
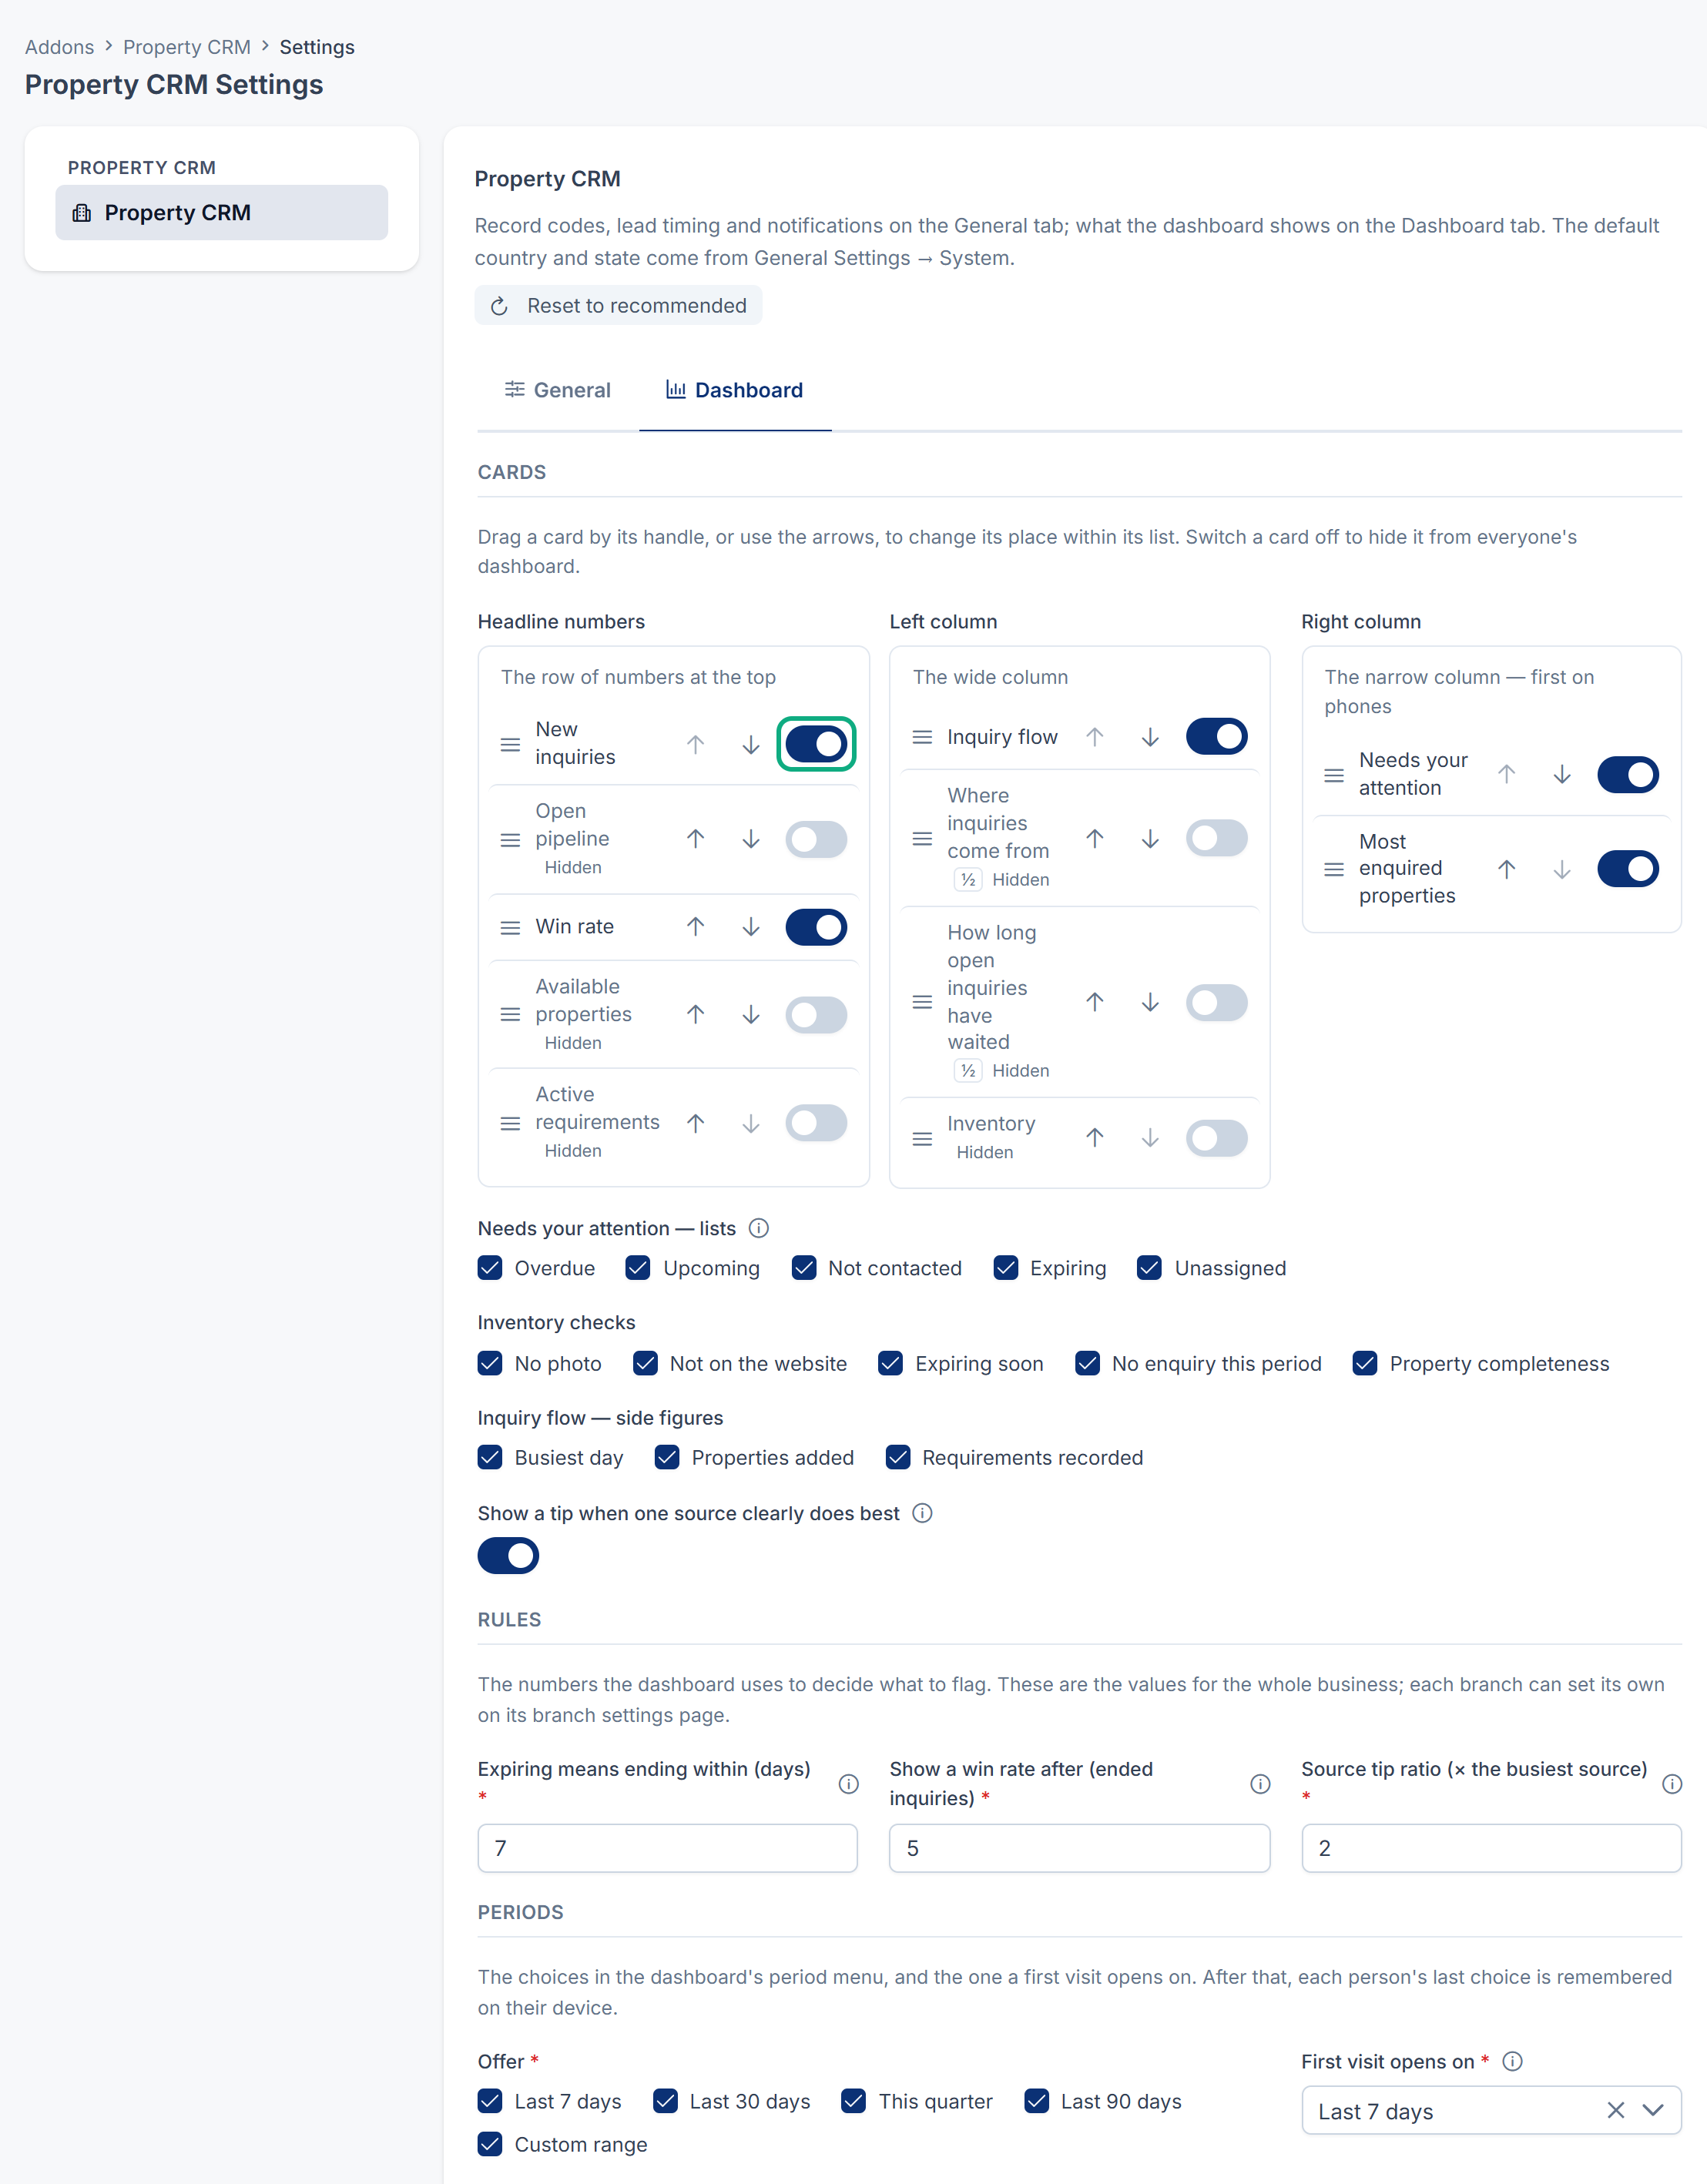
Open the Dashboard tab.
-
Under Cards, switch off any card your team doesn't need, and drag the rest into the order you want. A card you switch off is hidden from everyone's dashboard.
-
Under Periods, choose which periods people can pick, and the one the dashboard opens on the first time.
-
Select Save changes.
If Property CRM was installed while your business had no properties, requirements or inquiries, the dashboard starts smaller, with only New inquiries, Win rate, Inquiry flow, Needs your attention and Most enquired properties. Switch on more cards as your data grows, or select Reset to recommended to show them all.
5. Check the lists of choices
Dropdowns such as Inquiry Source, the reasons a lead is lost, Client Type, Property From and Amenities are static fields. You can add your own options, and rename or recolor the ones Property CRM ships.
-
Open Configurations › Master Settings › Static Fields.
-
Find the list by name, for example Inquiry Loss Reason, and add or edit its options. See Manage static fields and their options.
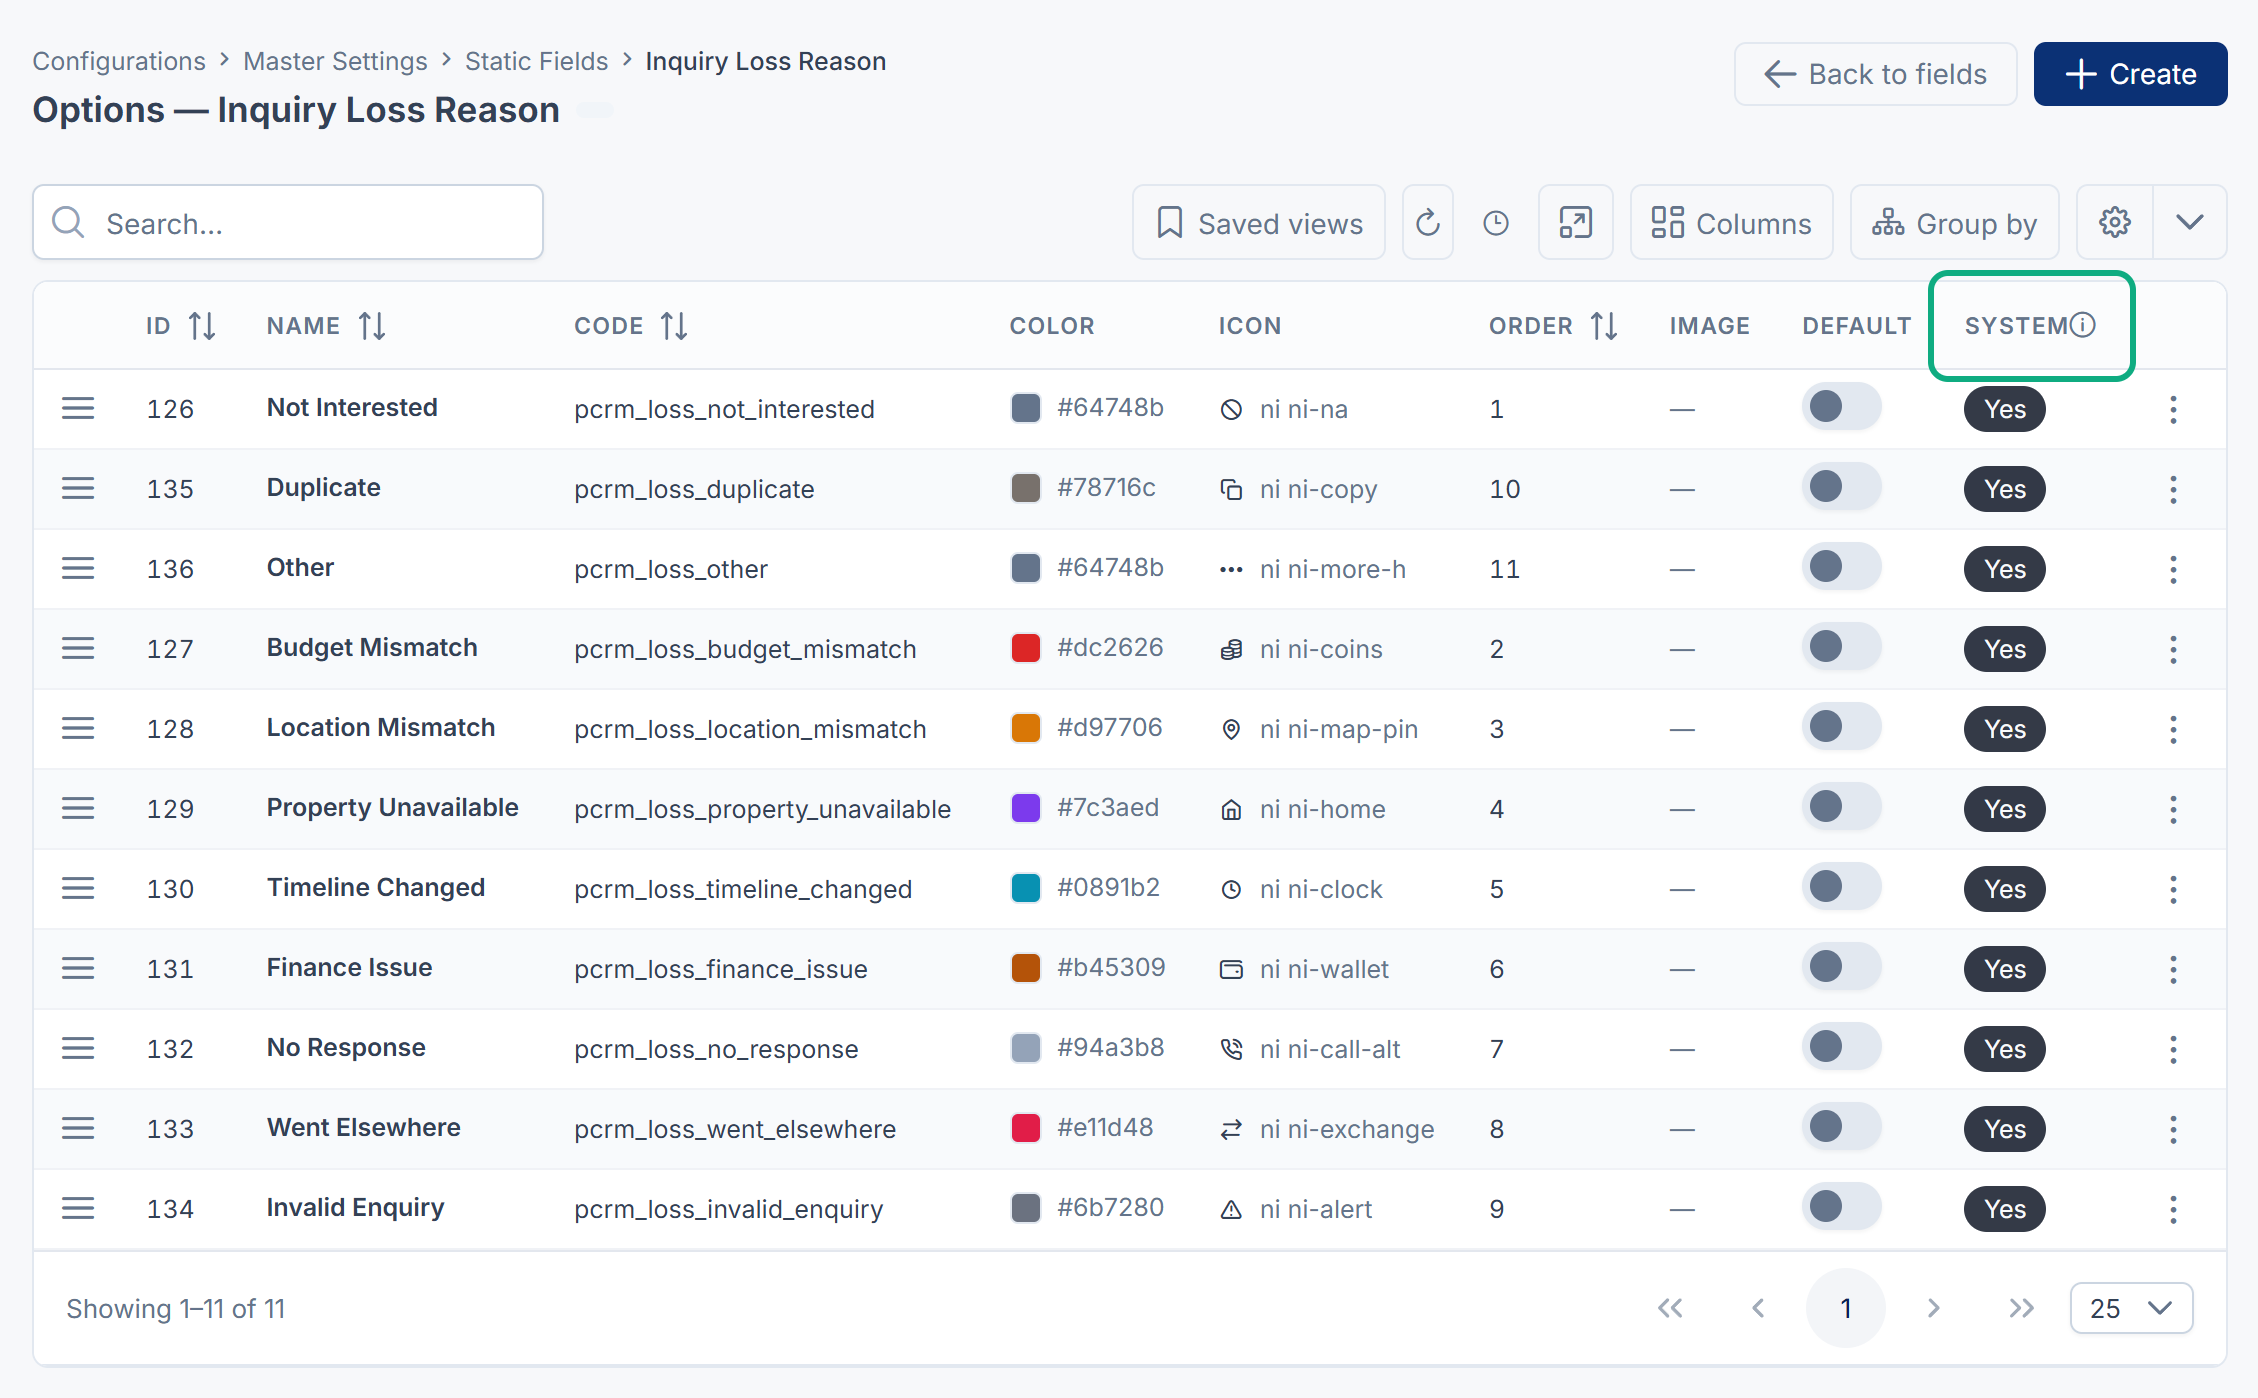
Careful: Options that Property CRM ships show Yes in the System column. You can rename and recolor them, but you can't delete them or change their code.
What happens next
Your team can sign in and switch to the Property CRM experience with View in the header, if it isn't the only one they can enter. A good first task is to add the properties you already have: see Add a property.
Thanks. That helps us decide what to write next.
Thanks for telling us what was missing.
You already answered for this article today. Thanks.
We got a lot of answers from your network just now. Try again in a few minutes.
We couldn't send that. Check your connection and try again.
Links in this article
Printed from help.bsscn.com. The online article may have changed since.