Edit a user
Change someone's name, email, photo, status, roles or experiences. You can also switch an account off without deleting it.
Why this step
When someone leaves, switch their account off the same day. Their history stays; their access doesn't.
Today you only need:
- Applies to
- Core 12.0 and later
- Who can do this
- Administrator, Platform owner
- Permission
feature.core. user.edit - Where
- Users Accounts › Users
Before you start
- You need the Edit User permission (
feature.).core. user.edit - You can't edit a super admin's account unless you're a super admin yourself. If you aren't, super admin accounts don't appear in the list at all.
- To change which experiences someone can enter, first switch to the workspace you want to change. See Choose which experiences a user can enter.
Steps
-
In the menu, open Users Accounts › Users.
-
Type in the list's search box to find the person.
-
Open the row's actions menu (Row actions) and select Edit.
-
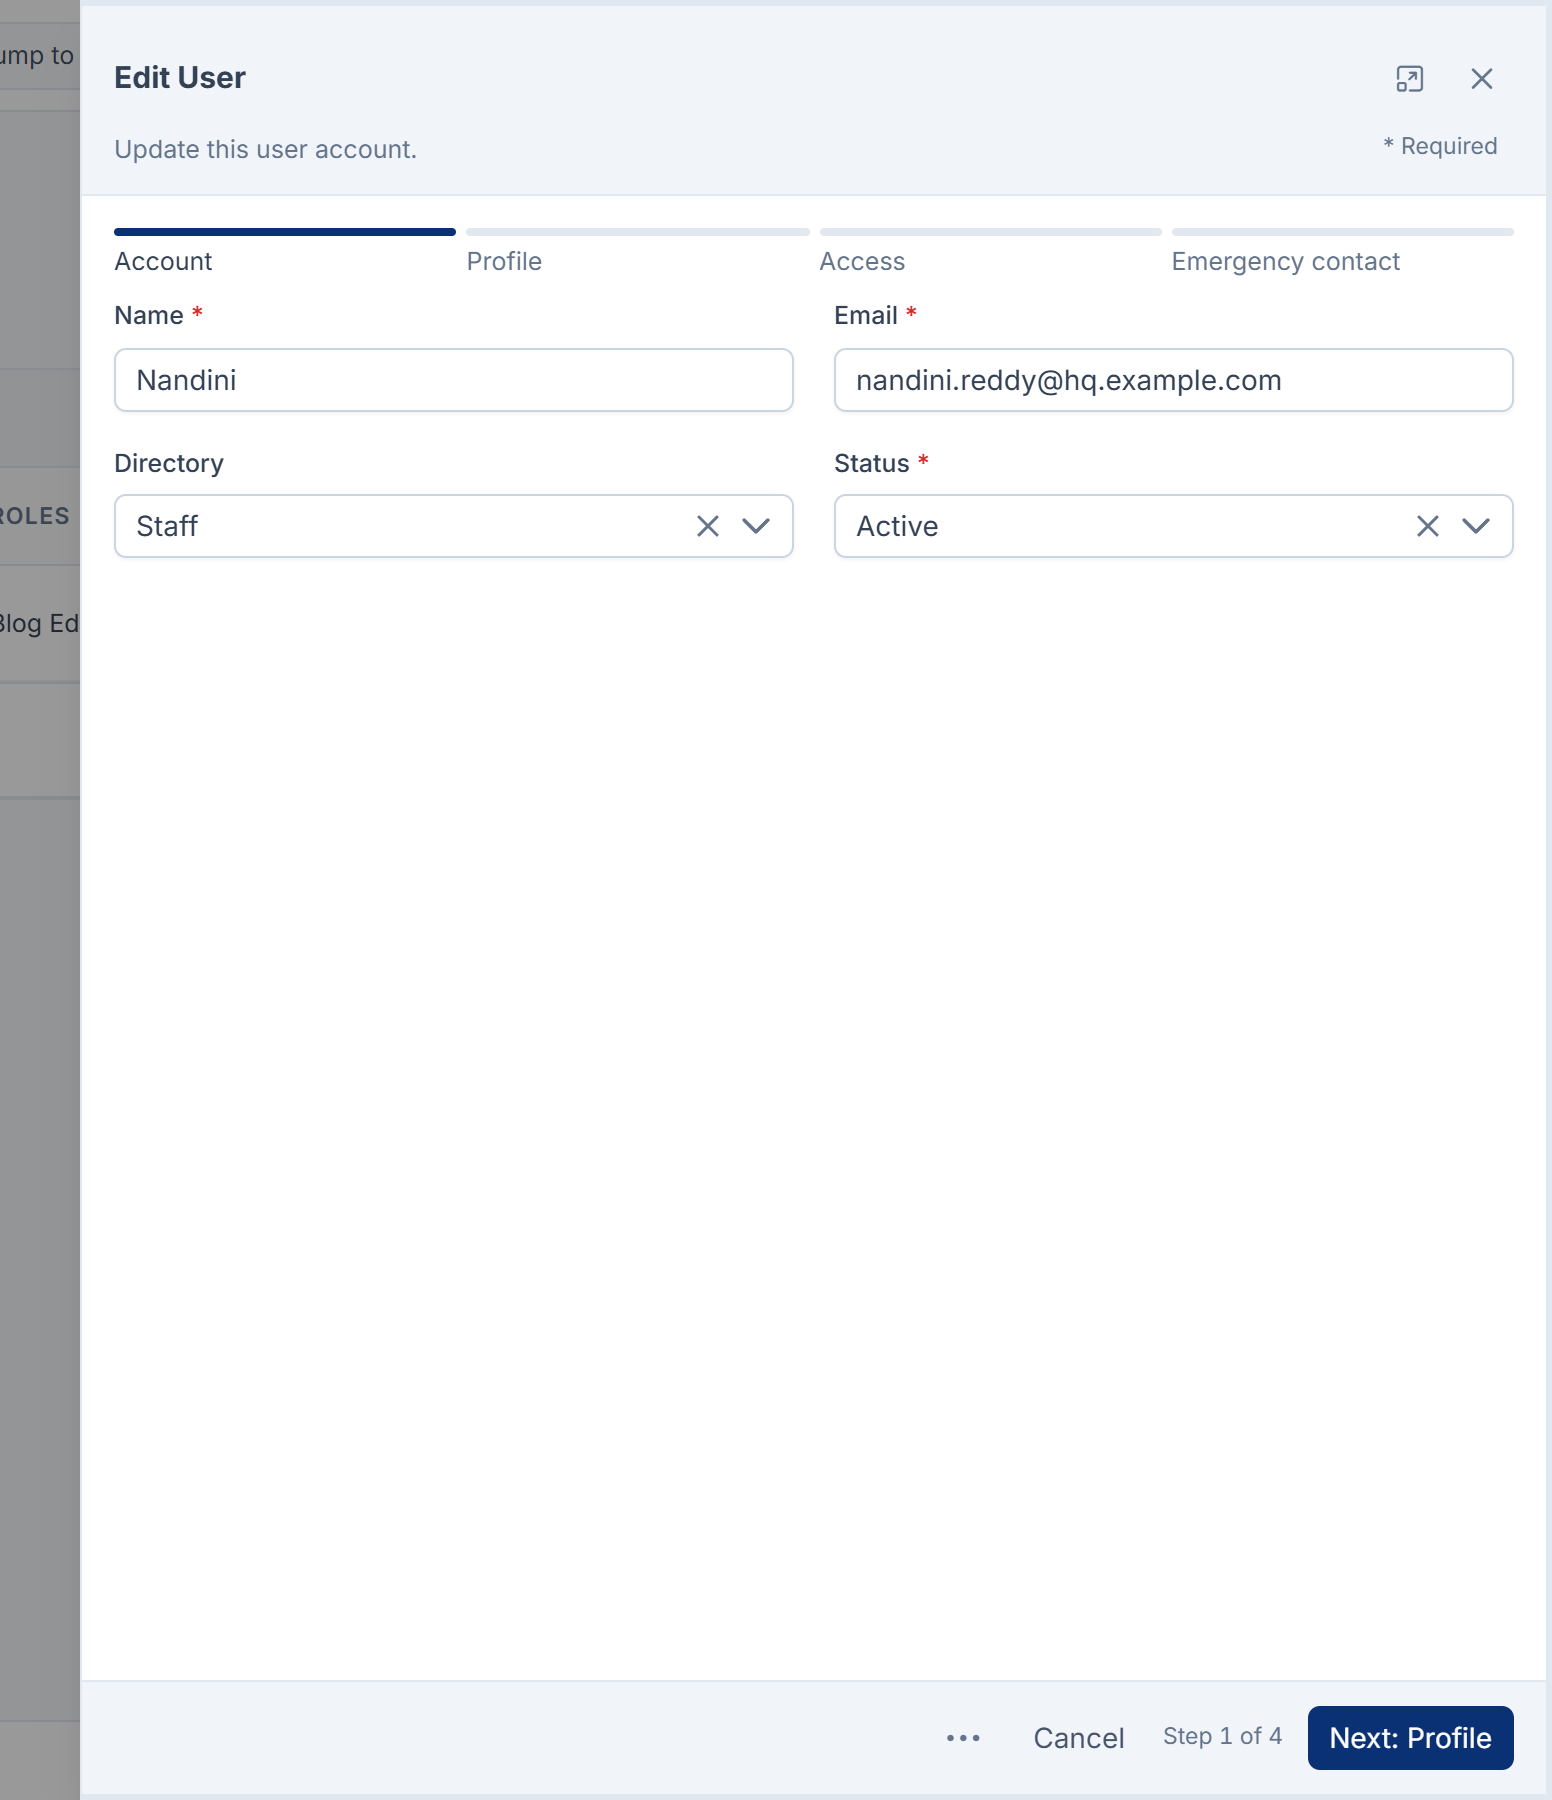
On the Account step, change Name, Email, Directory (Staff or Portal) or Status (Active or Inactive).
-
Select Next: Profile.
-
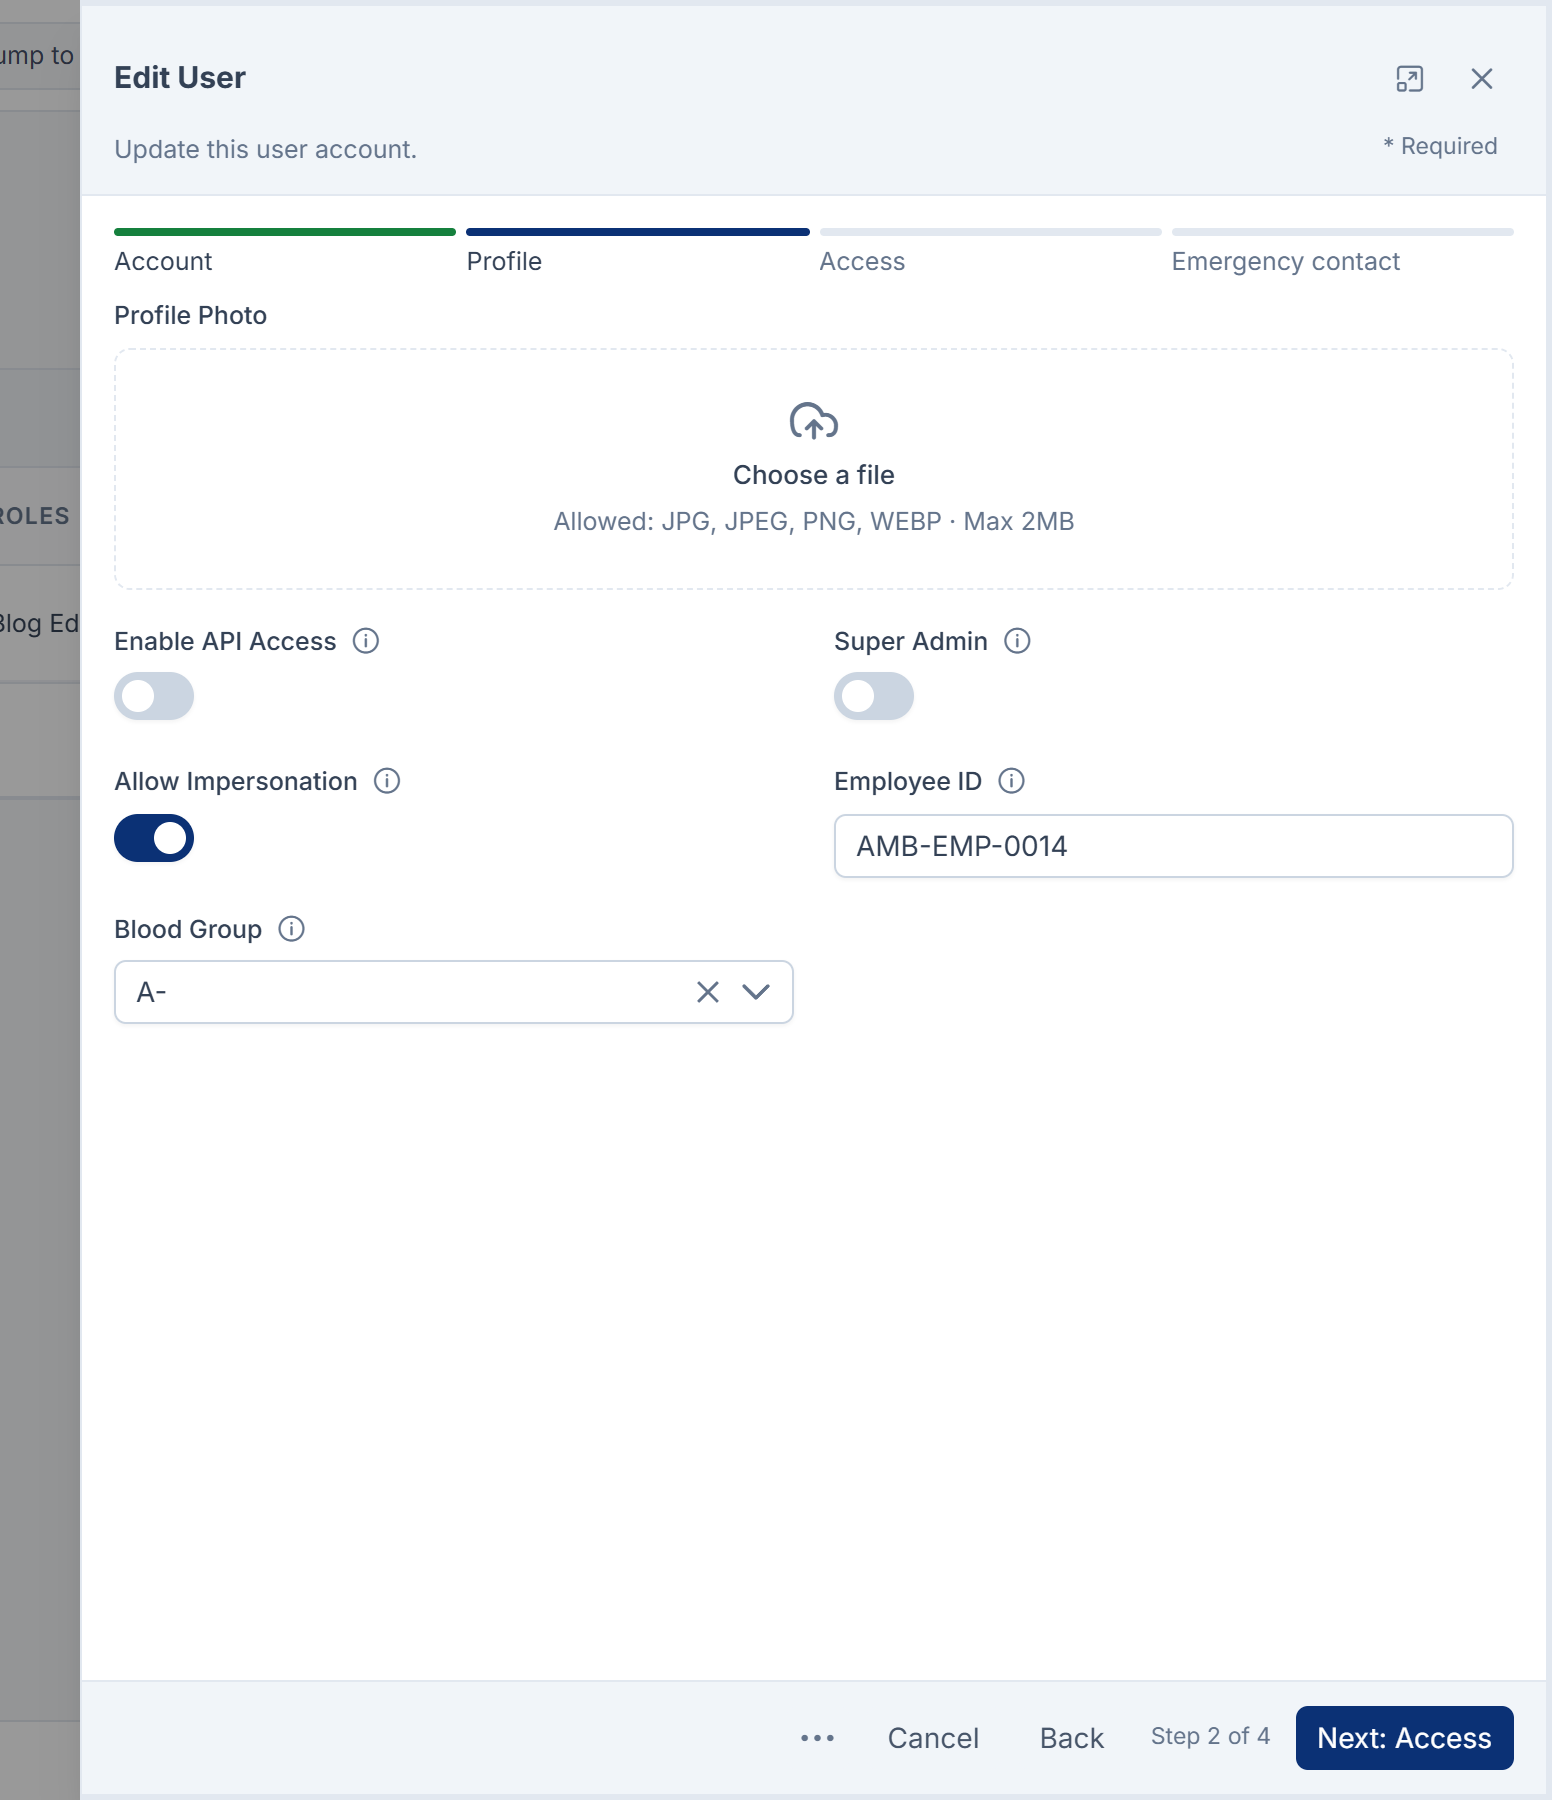
On the Profile step, change the Profile Photo if you need to. It must be a JPG, PNG or WebP file of 2 MB or less. This step also has Enable API Access and any custom fields your installation adds.
-
Select Next: Access.
-
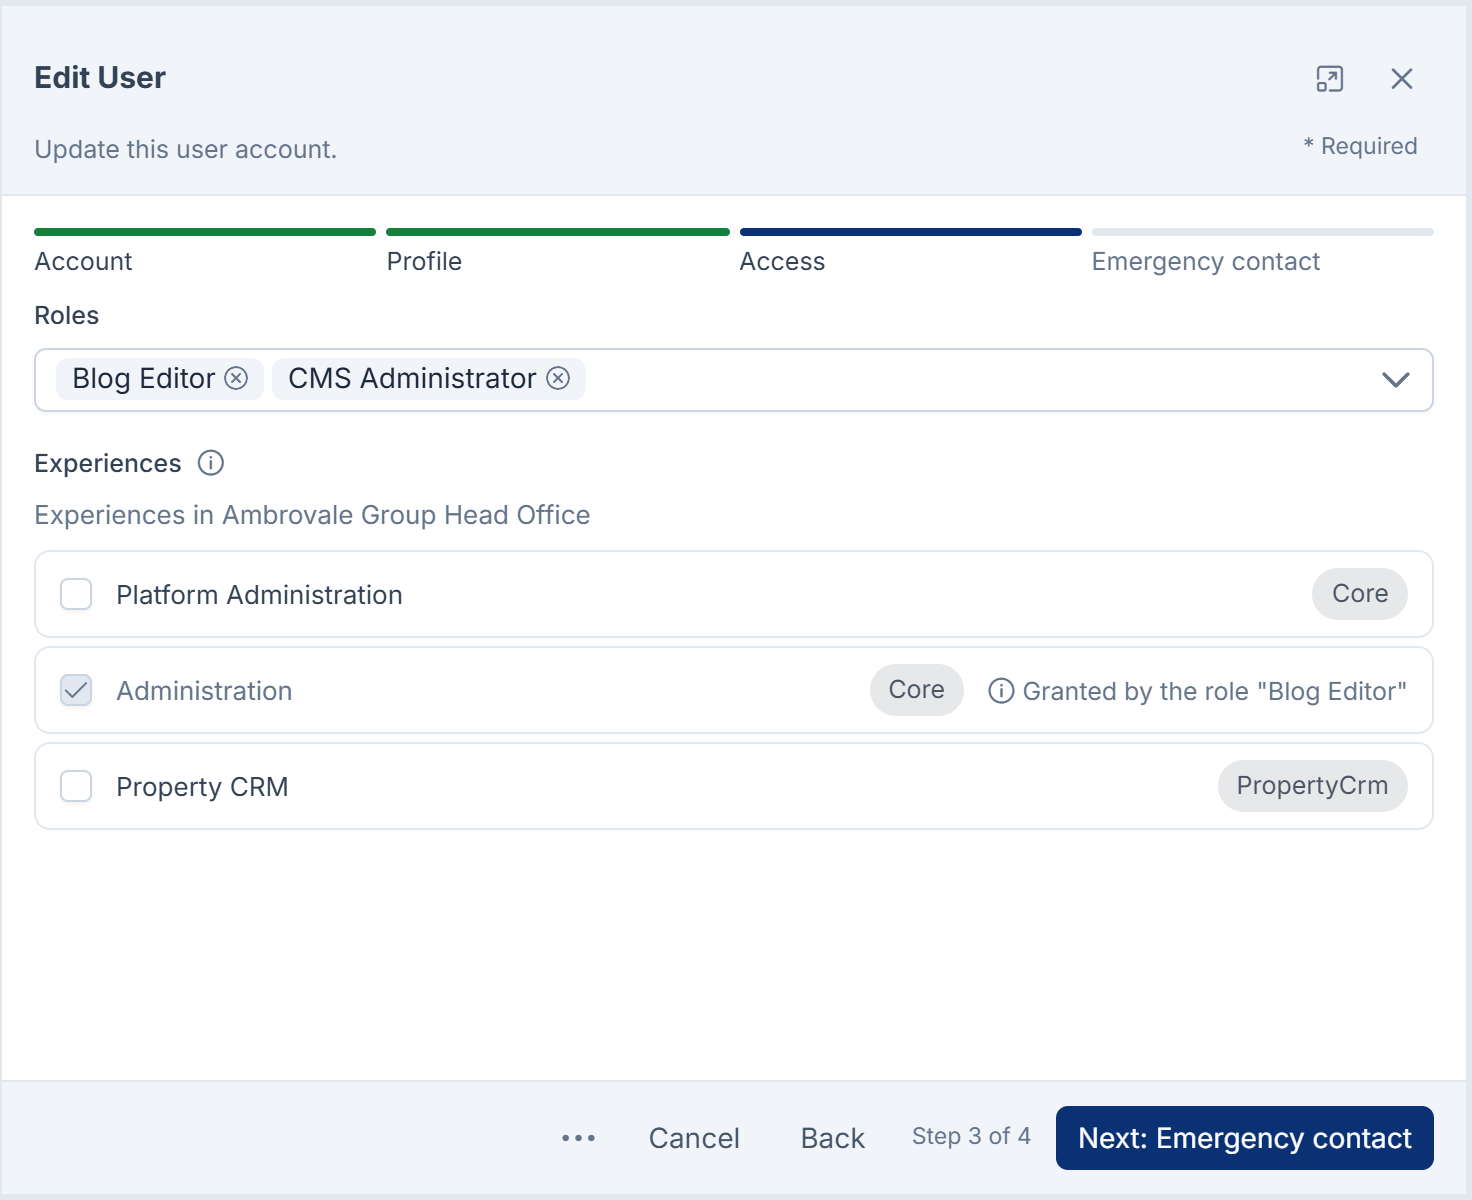
On the Access step, choose the person's Roles and Experiences.
-
Select Save.
To fix a name quickly, you can edit it directly in the Name cell of the list.
Super admins also see the Super Admin and Allow Impersonation switches on the Profile step. See Super admin vs Administrator.
Careful: A super admin skips every permission check. Only make someone a super admin if they will run the whole platform.
Switch an account off without deleting it
-
In Users Accounts › Users, open the row's actions menu.
-
Select Deactivate. The person's Status changes to Inactive.
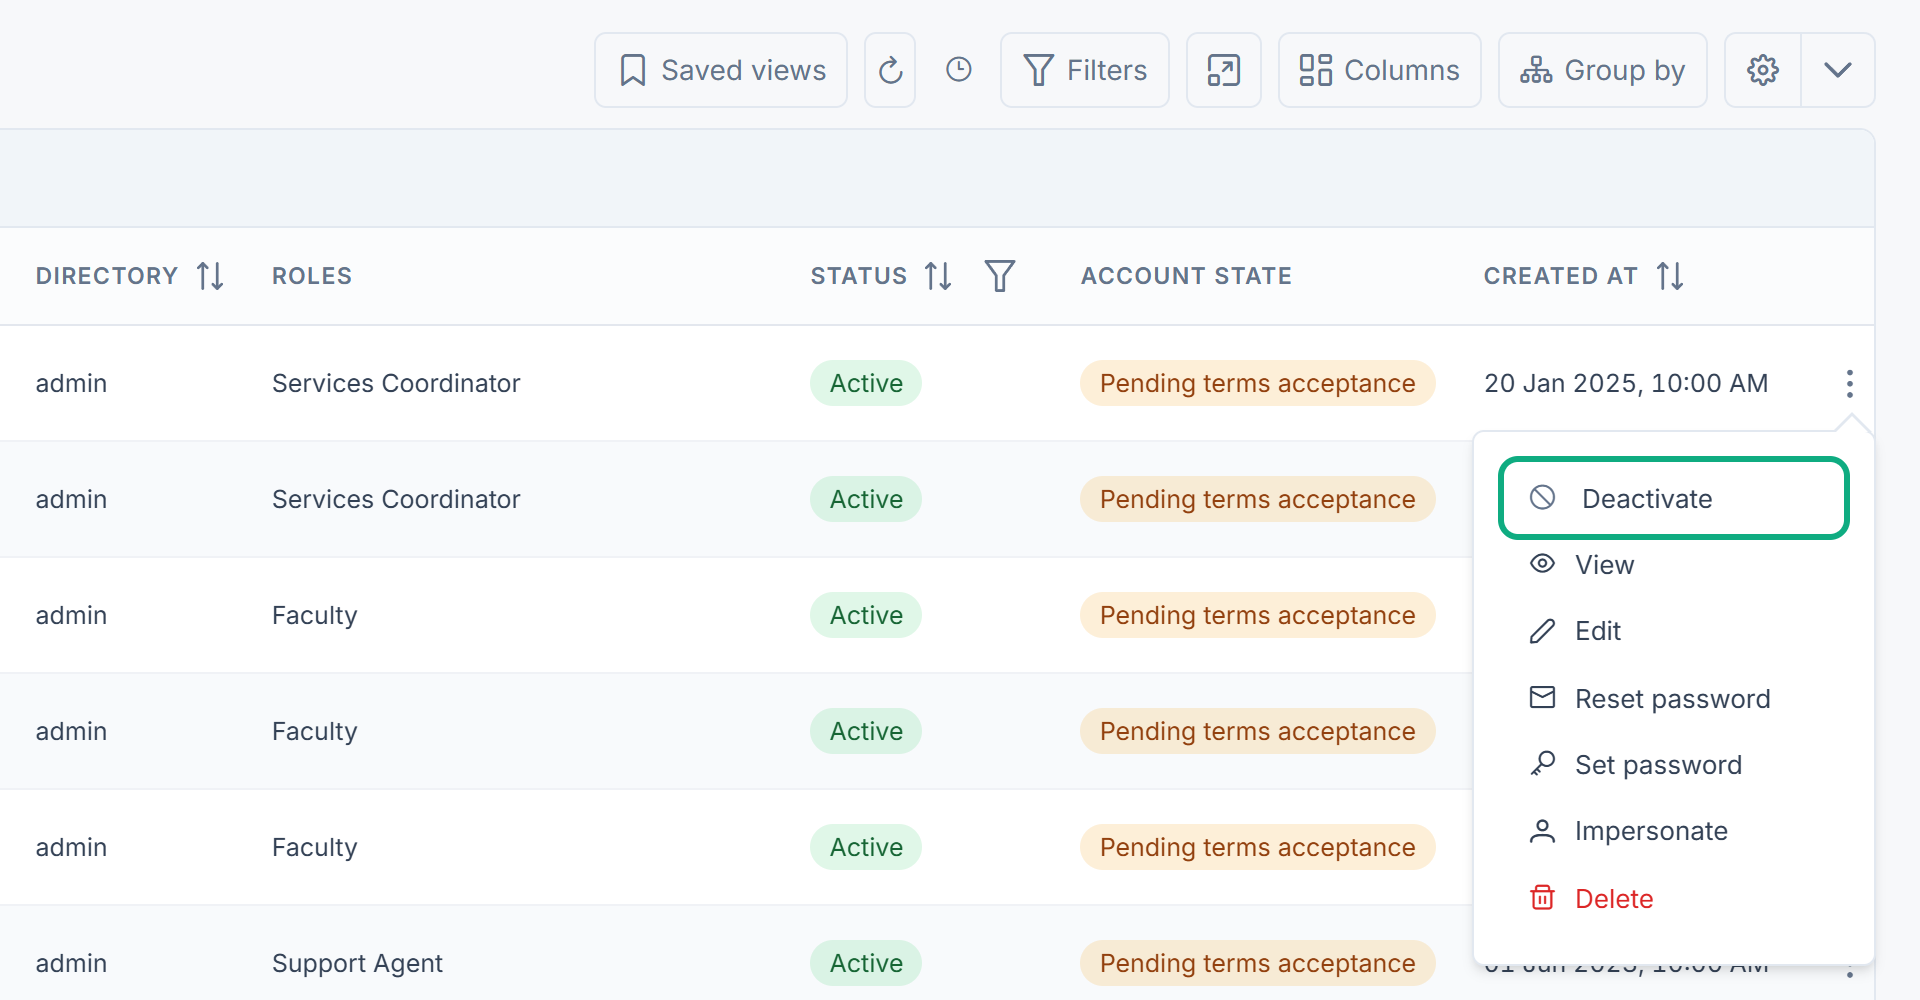
To switch the account back on, select Activate. To change several accounts at once, tick their rows and use Activate or Deactivate in the bar that appears.
What happens next
Laramin saves the changes and confirms with "User … Details Updated Successfully!". If you didn't change anything, it says No Changes Made!
An inactive account can't sign in. The person sees User account not found/ inactive. Contact your administrator!.
The Roles field sets roles that apply everywhere, whichever team you're working in. Roles that apply only inside one team are managed in the Roles & Permissions module. See Give someone a role.
Links in this article
Printed from help.bsscn.com. The online article may have changed since.