Set up and turn on Demo Mode
Write the message visitors see, choose the ribbon's color and button, add any exceptions, and turn Demo Mode on. Then switch it off again from the panel, the server or the command line.
- Applies to
- Demo Mode 1.3 and later
- Who can do this
- Platform owner
- Where
- Demo Mode (Platform Administration), or Settings hub › Demo Mode
On this page
Before you start
- You must be a super admin. The Demo Mode panel is hidden from everyone else.
- Install and turn on the Demo Mode add-on. See Upload and install an add-on.
- Get the demo data ready first. Once Demo Mode is on, nobody can change data from the screens, you included.
- Create the account visitors will sign in with, and give it a role that shows what you want to show. See Create a user.
Steps
-
In the Platform Administration sidebar, select Demo Mode. The Demo Mode panel opens in the Settings hub.
-
Open the Warning Messages tab. In Warning Message (English), write the message visitors see on the ribbon and when a change is refused. There's one box for each language your Laramin has turned on.
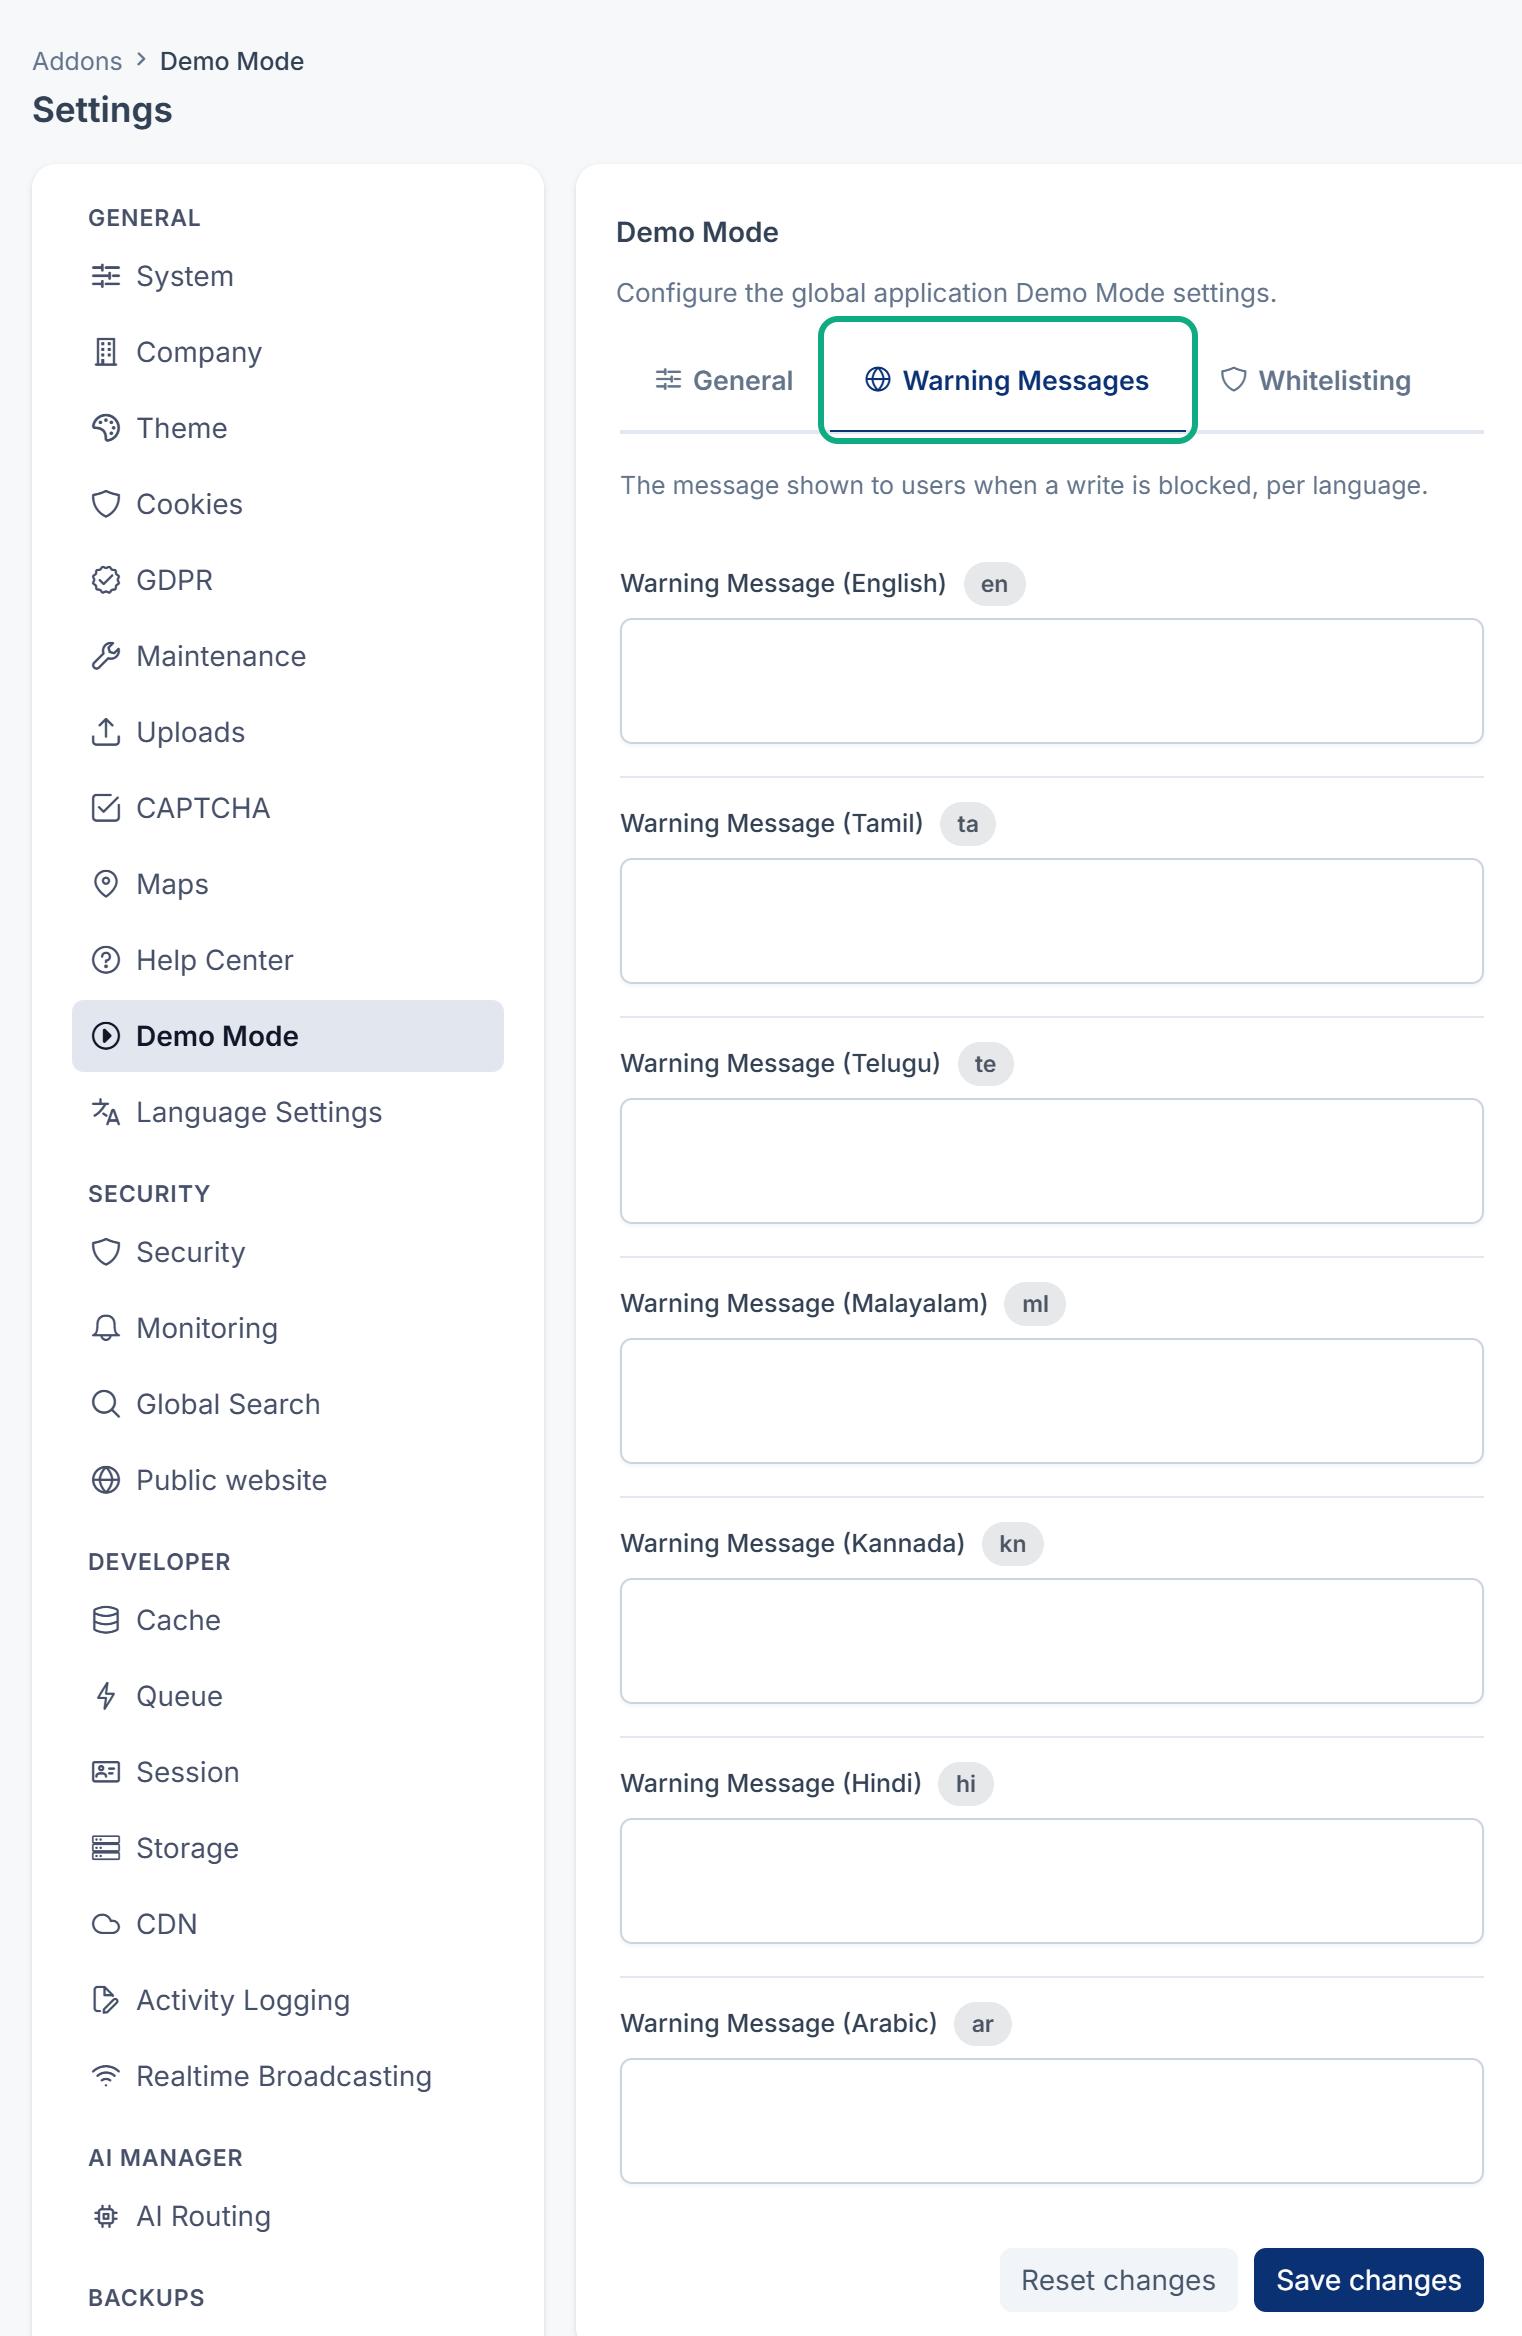
If you leave a box empty, visitors see your English message, or else the standard one: "This application is currently running in Demo Mode. Changes are disabled in this environment. Contact the administrator for a personalized demonstration."
-
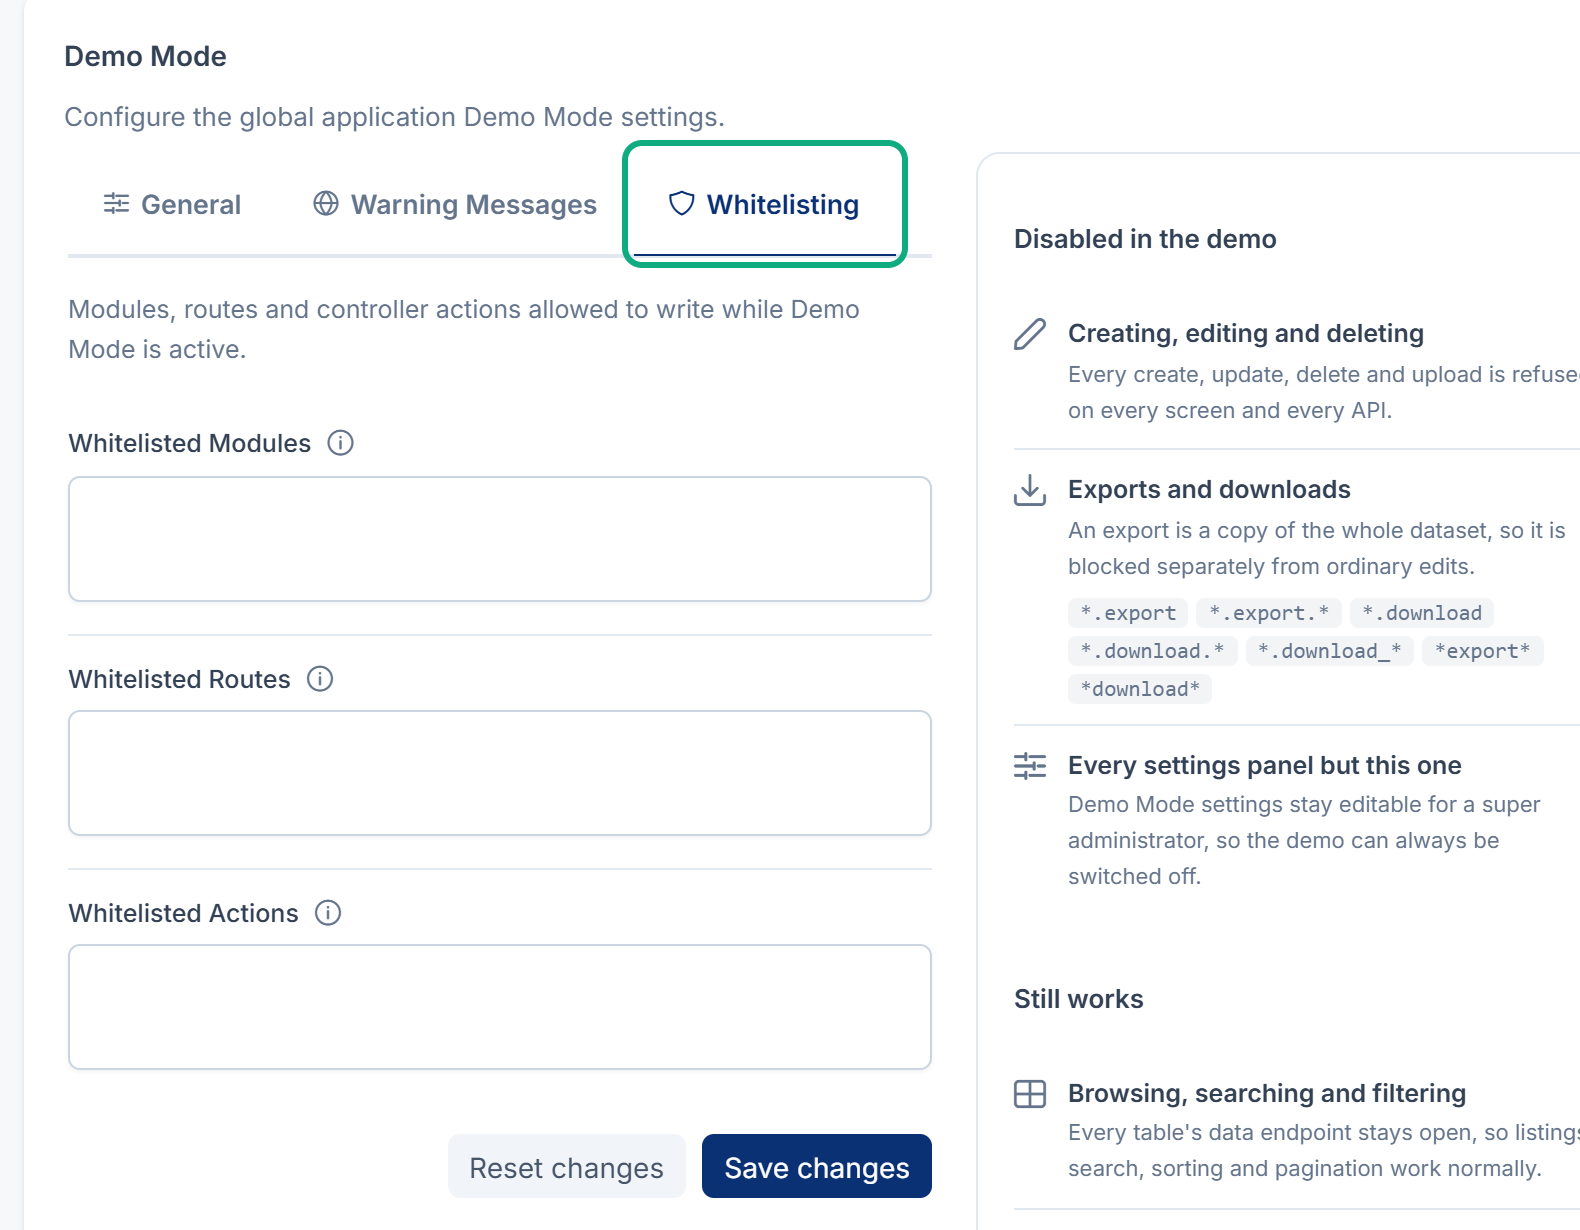
Optional: open the Whitelisting tab and add anything that must stay writable. Read Exceptions below first.
-
Open the General tab.
-
Optional: in Bypass Key, enter a long, random secret for your own scripts.
-
Optional: choose a Demo Accent Colour for the ribbon. Pick one that can't be mistaken for the maintenance or impersonation banners.
-
Optional: in Call-to-action link, enter the address the ribbon's Get your own instance button should open, such as your sign-up page. Without it, there's no button.
-
Set Demo Mode Status to Active.
-
Select Save changes.
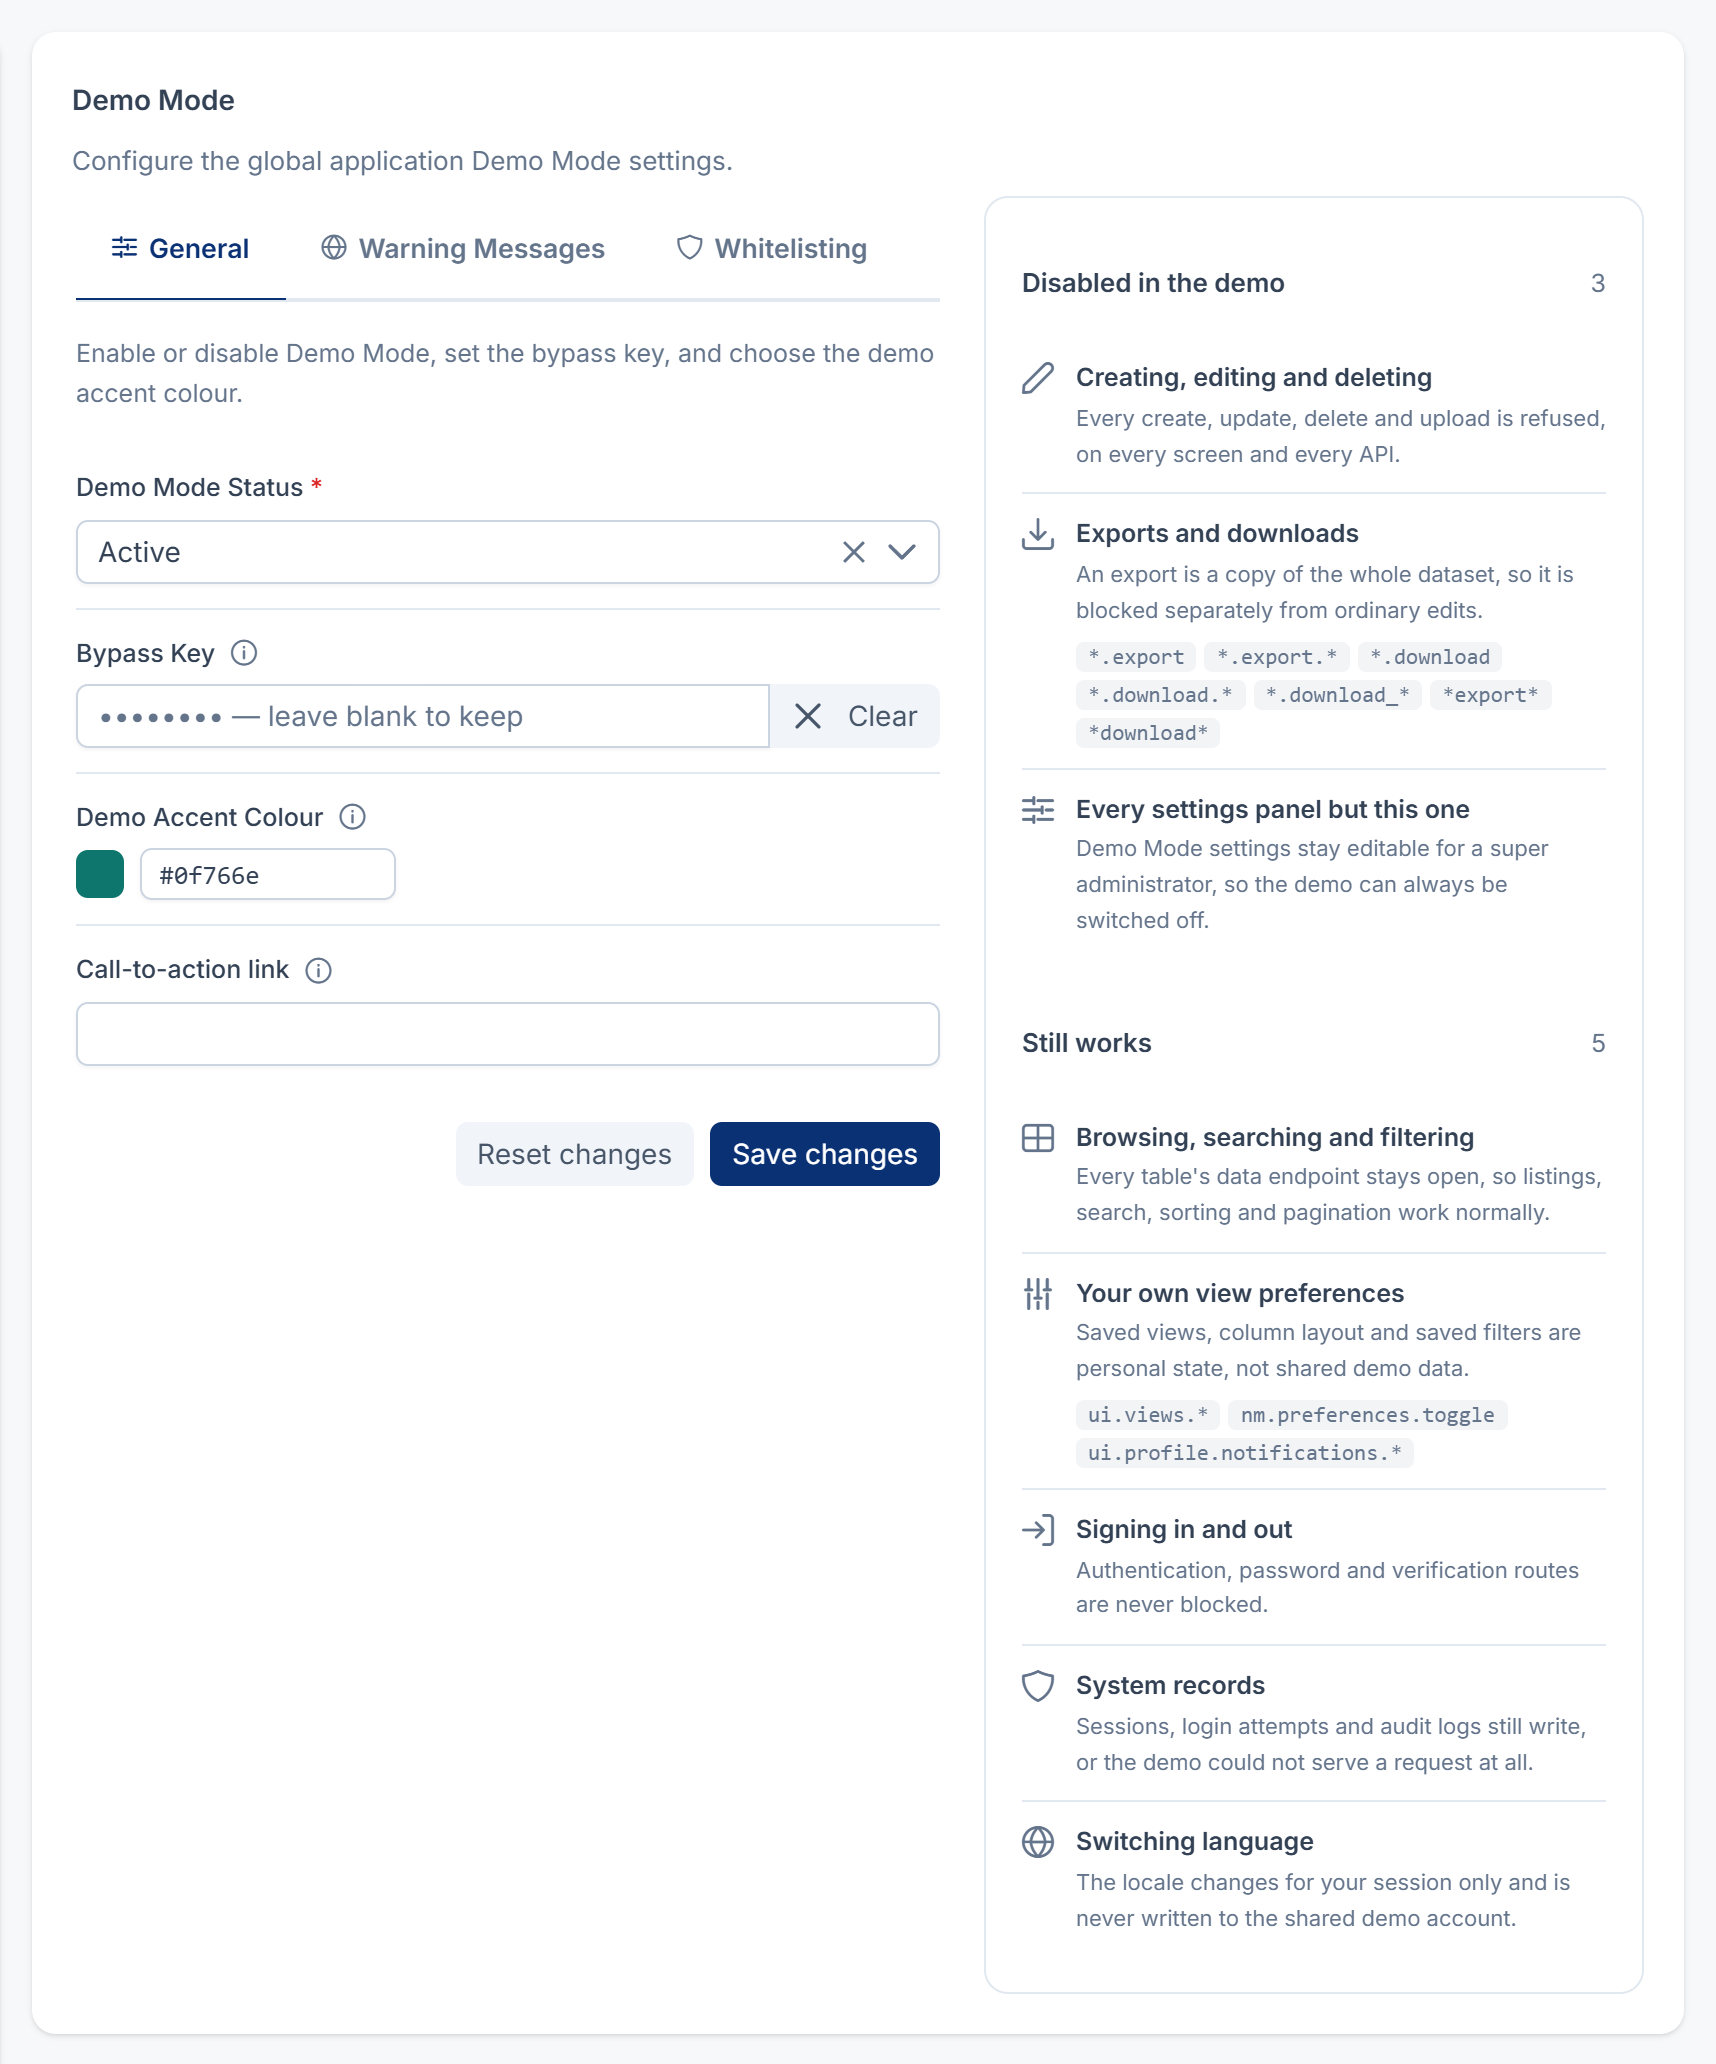
The ribbon appears on every page, for everyone. The Disabled in the demo and Still works boxes beside the form show what visitors can and can't do.
The settings
| Tab | Field | What it does |
|---|---|---|
| General | Demo Mode Status | Active turns Demo Mode on. Inactive turns it off. Shows Locked when the server's .env file decides instead. |
| General | Bypass Key | A secret that lets a single request through, as ?demo_bypass= plus the key, or an X-Demo-Bypass header. Stored without being shown again: the hint names its last four characters. Leave the box empty to keep the stored key. |
| General | Demo Accent Colour | The ribbon's color, as #RRGGBB. The default is a teal, #0f766e. |
| General | Call-to-action link | Where the ribbon's Get your own instance button goes. A full web address, up to 255 characters. Leave it empty for no button. |
| Warning Messages | Warning Message (one per language) | The message on the ribbon and in refusals, in that language. |
| Whitelisting | Whitelisted Modules | Add-ons that stay fully writable. |
| Whitelisting | Whitelisted Routes | Route names that stay writable. |
| Whitelisting | Whitelisted Actions | Controller actions that stay writable. |
Separate whitelist entries with new lines or commas.
Exceptions
Whitelisting opens a gap in the demo, so add only what you must.
- Whitelisted Modules takes an add-on's folder name, such as
Blog. Capital letters don't matter. Every visitor can then create, change, delete and export everything in that add-on. - Whitelisted Routes takes route names, such as
blog.posts.store, and*as a wildcard. The field's hint says it also accepts URI paths, but entries are compared with route names only, so a path such asadmin/blog/postsmatches nothing. - Whitelisted Actions takes full controller actions, such as
App\, withHttp\ Controllers\ Auth\ LoginController@login *as a wildcard.
A whitelisted entry is also allowed to export.
Careful: Never whitelist settings, users, roles or anything that holds personal data. A visitor could change what every other visitor sees, or download it.
Turn Demo Mode off
- Open the Demo Mode panel. It stays open to super admins while the demo is on.
- Set Demo Mode Status to Inactive.
- Select Save changes.
Someone with access to the server can also run php artisan demomode:toggle inactive. It takes effect straight away.
If Demo Mode Status shows Locked, the panel can't change it. Ask whoever runs your server to remove DEMO_MODE from the .env file, or set it to false. If the server caches its configuration, they then run php artisan config:clear or rebuild the cache.
Server settings
Whoever runs your server can set these in the .env file. Each one takes priority over the panel.
| Variable | What it does |
|---|---|
DEMO_MODE | true or false locks Demo Mode on or off. Leave it out to let the panel decide. |
DEMO_ | The bypass key. Used instead of the panel's Bypass Key. |
DEMO_ | The standard message, used when no warning message is filled in. |
DEMO_ | false allows exports and downloads in the demo. On by default. |
What happens next
Sign in as your demo visitor in a private browser window and try saving something. You should see That change was not saved. If something you expected to work is refused, see Changes aren't saved because Demo Mode is on.
Thanks. That helps us decide what to write next.
Thanks for telling us what was missing.
You already answered for this article today. Thanks.
We got a lot of answers from your network just now. Try again in a few minutes.
We couldn't send that. Check your connection and try again.
Links in this article
Printed from help.bsscn.com. The online article may have changed since.