Add a custom field
Add your own field to users or another kind of record: pick the entity, choose the field type, set its options and whether it's required, and check it in the live preview.
- Applies to
- Custom Fields 2.0 and later
- Who can do this
- Platform owner, Administrator
- Permission
feature.cf. custom_field. create - Where
- Custom Field › Custom Fields
On this page
This example adds a Department drop-down to every user. The steps are the same for any entity and field type.
Before you start
- You need List Entity (
feature.), View Entity (cf. entity.list feature.), List Custom Field (cf. entity.view feature.) and Create Custom Field (cf. custom_field.list feature.).cf. custom_field. create - You also need Edit Custom Field (
feature.): without it, the Create field button isn't shown.cf. custom_field.edit - Decide the field's title carefully. Laramin makes the field's name from it, and the name can't be changed later.
Steps
-
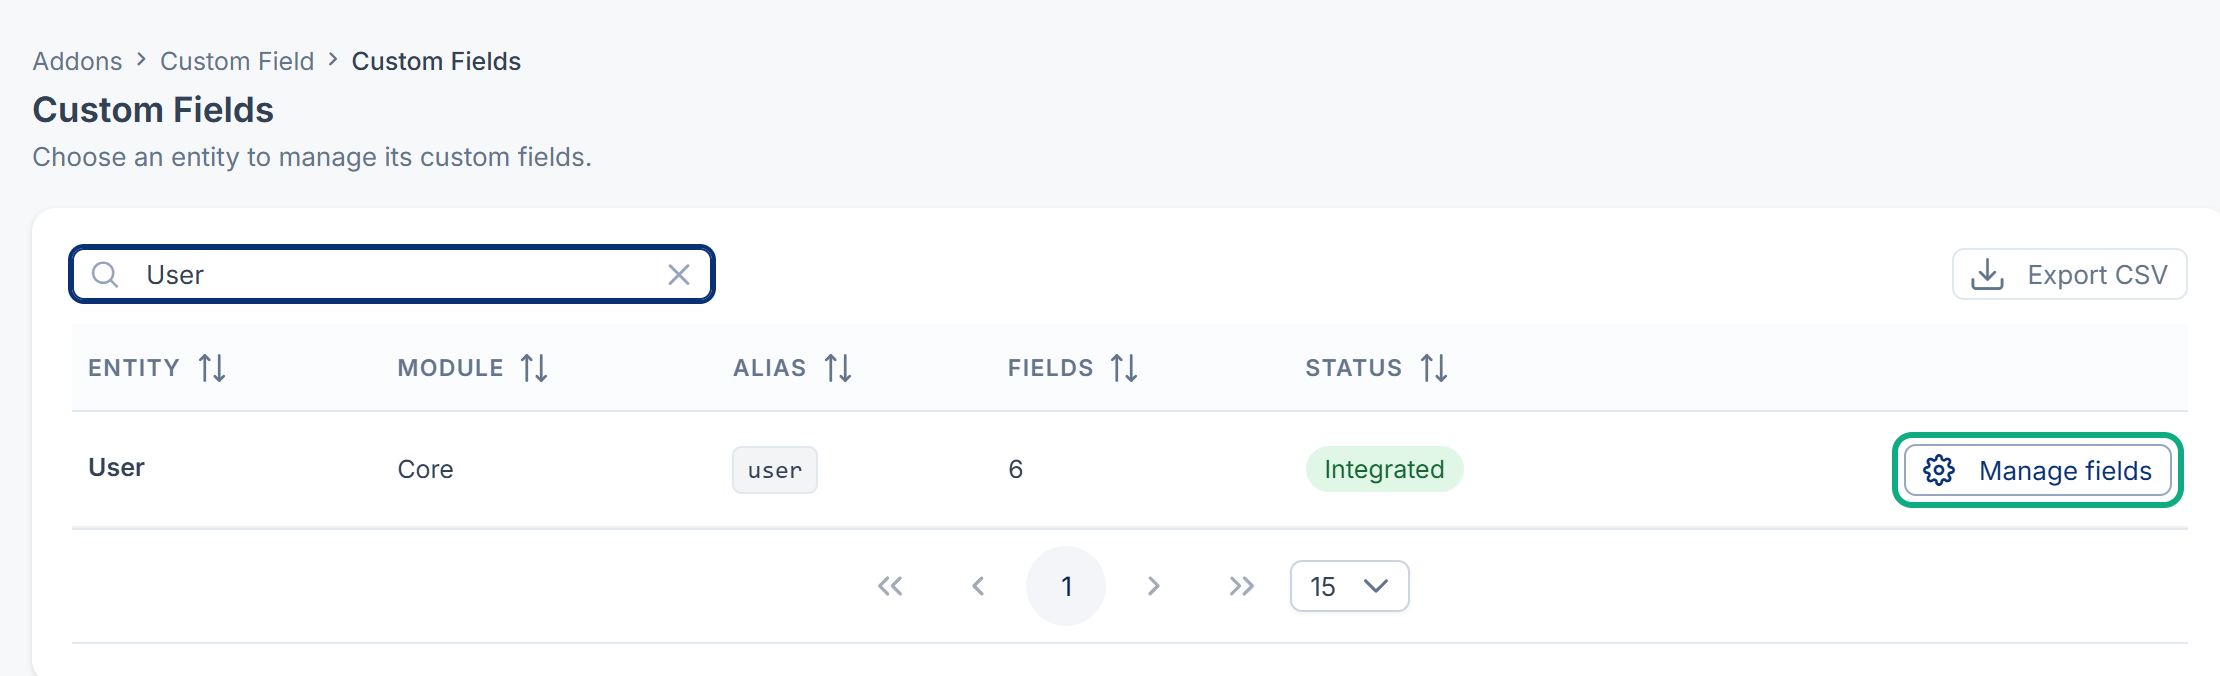
In the sidebar, open Custom Field › Custom Fields. The list of entities opens.
-
Find User. Type in Search entities… to narrow the list. Then select Manage fields on its row.
-
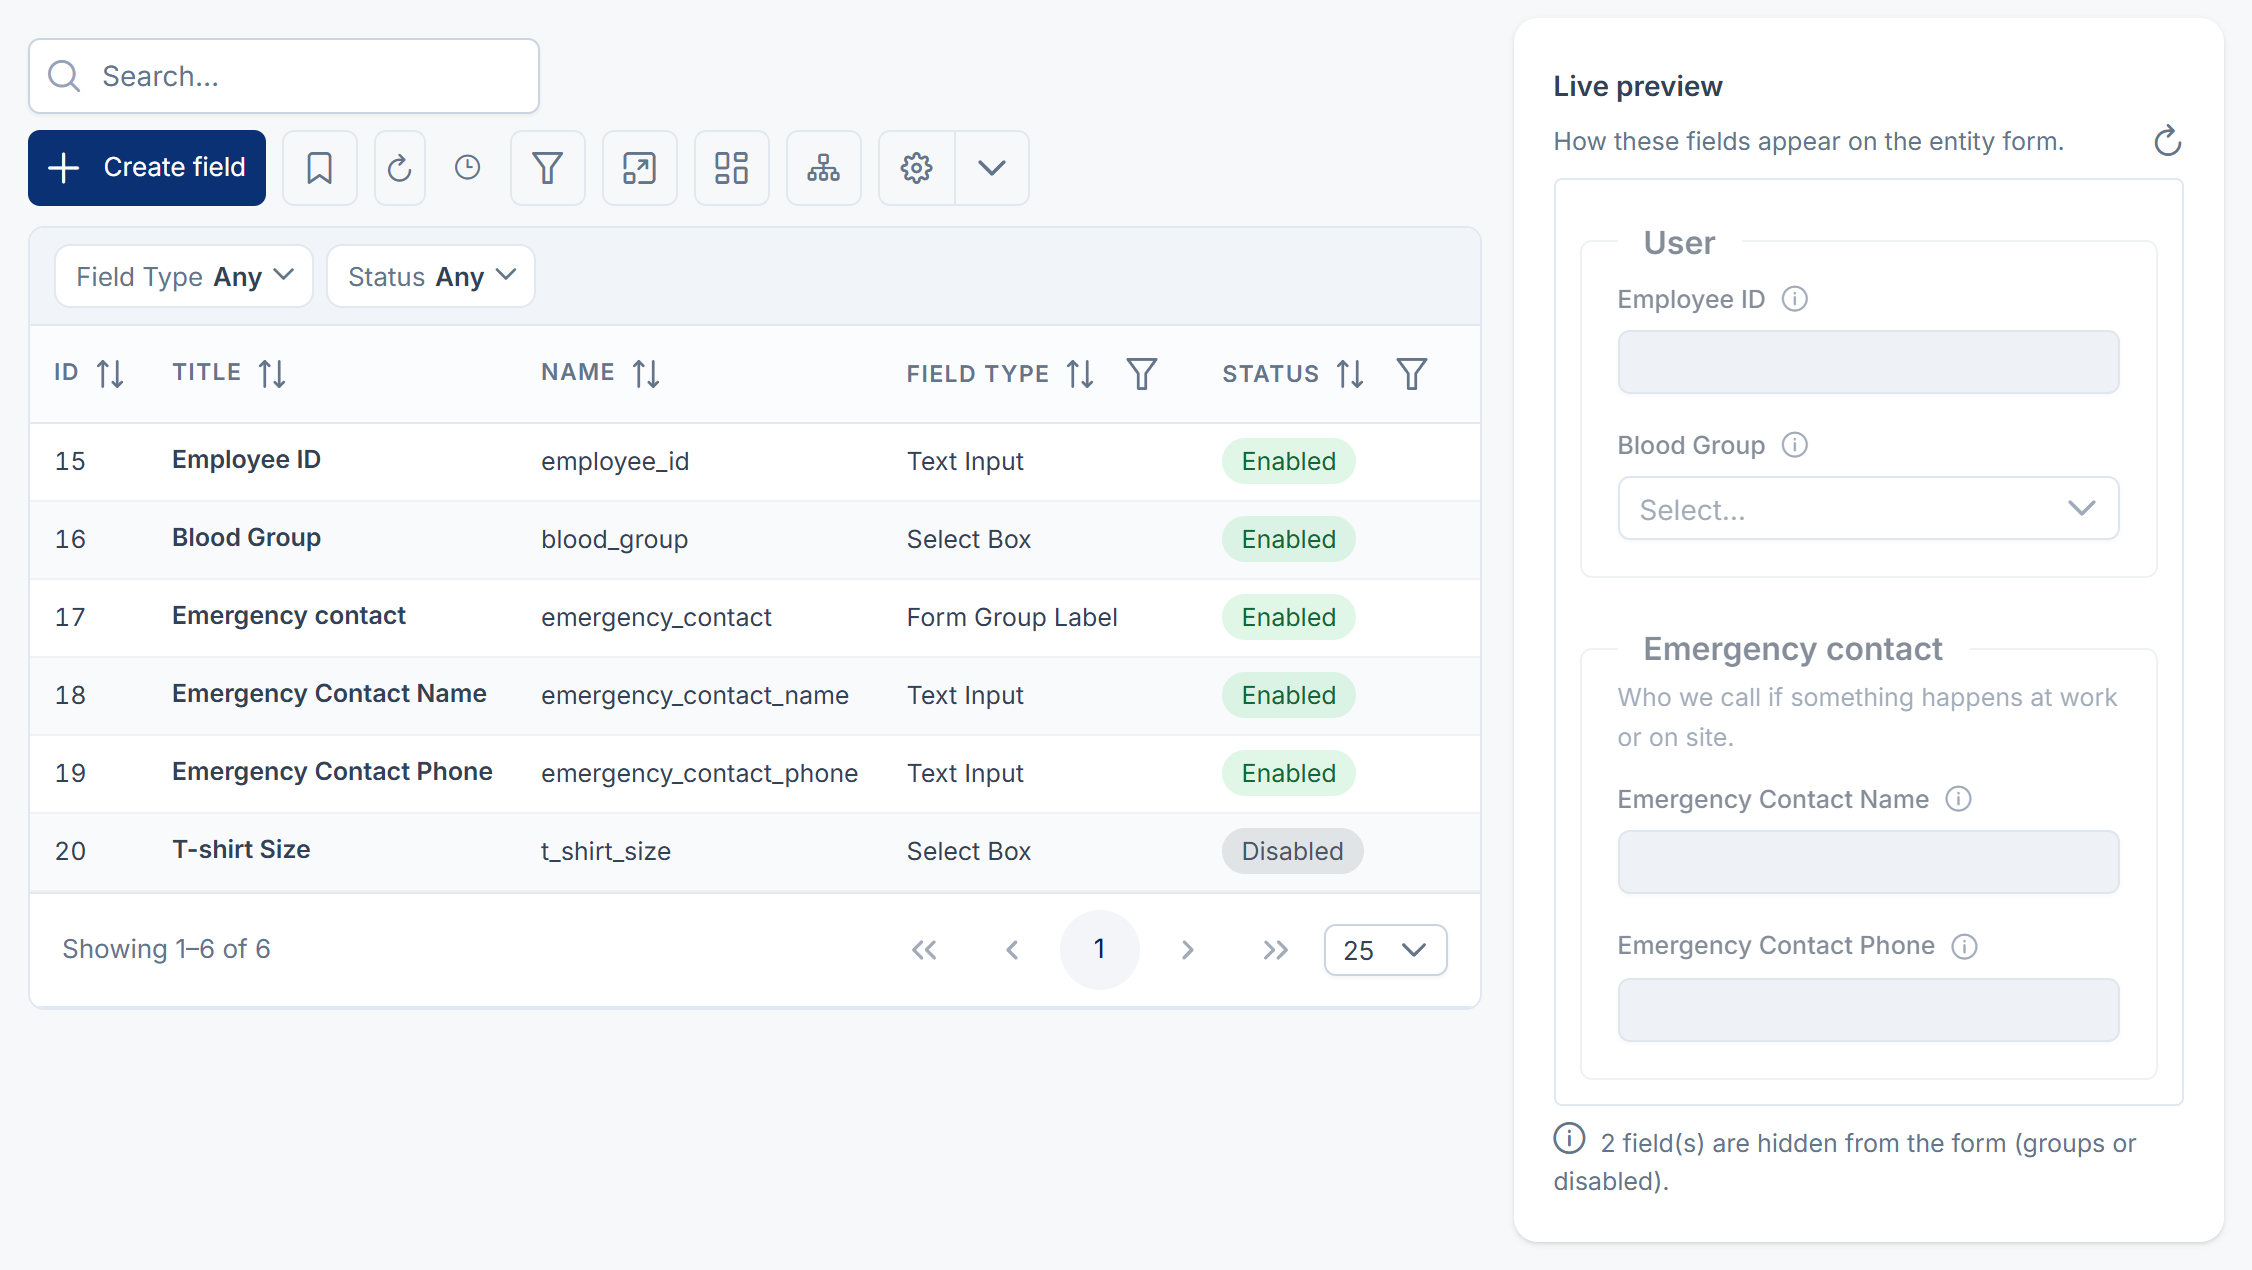
Select Create field. The Add field panel opens.
-
In Title, enter
Department. If your Laramin uses more than one language, you can enter the title in each. -
In Field Type, choose Select Box.
-
Under Options, add one row per choice. In each row, enter an Option Value, which is saved, and an Option Label, which people see, for example
salesandSales. Drag rows to order them.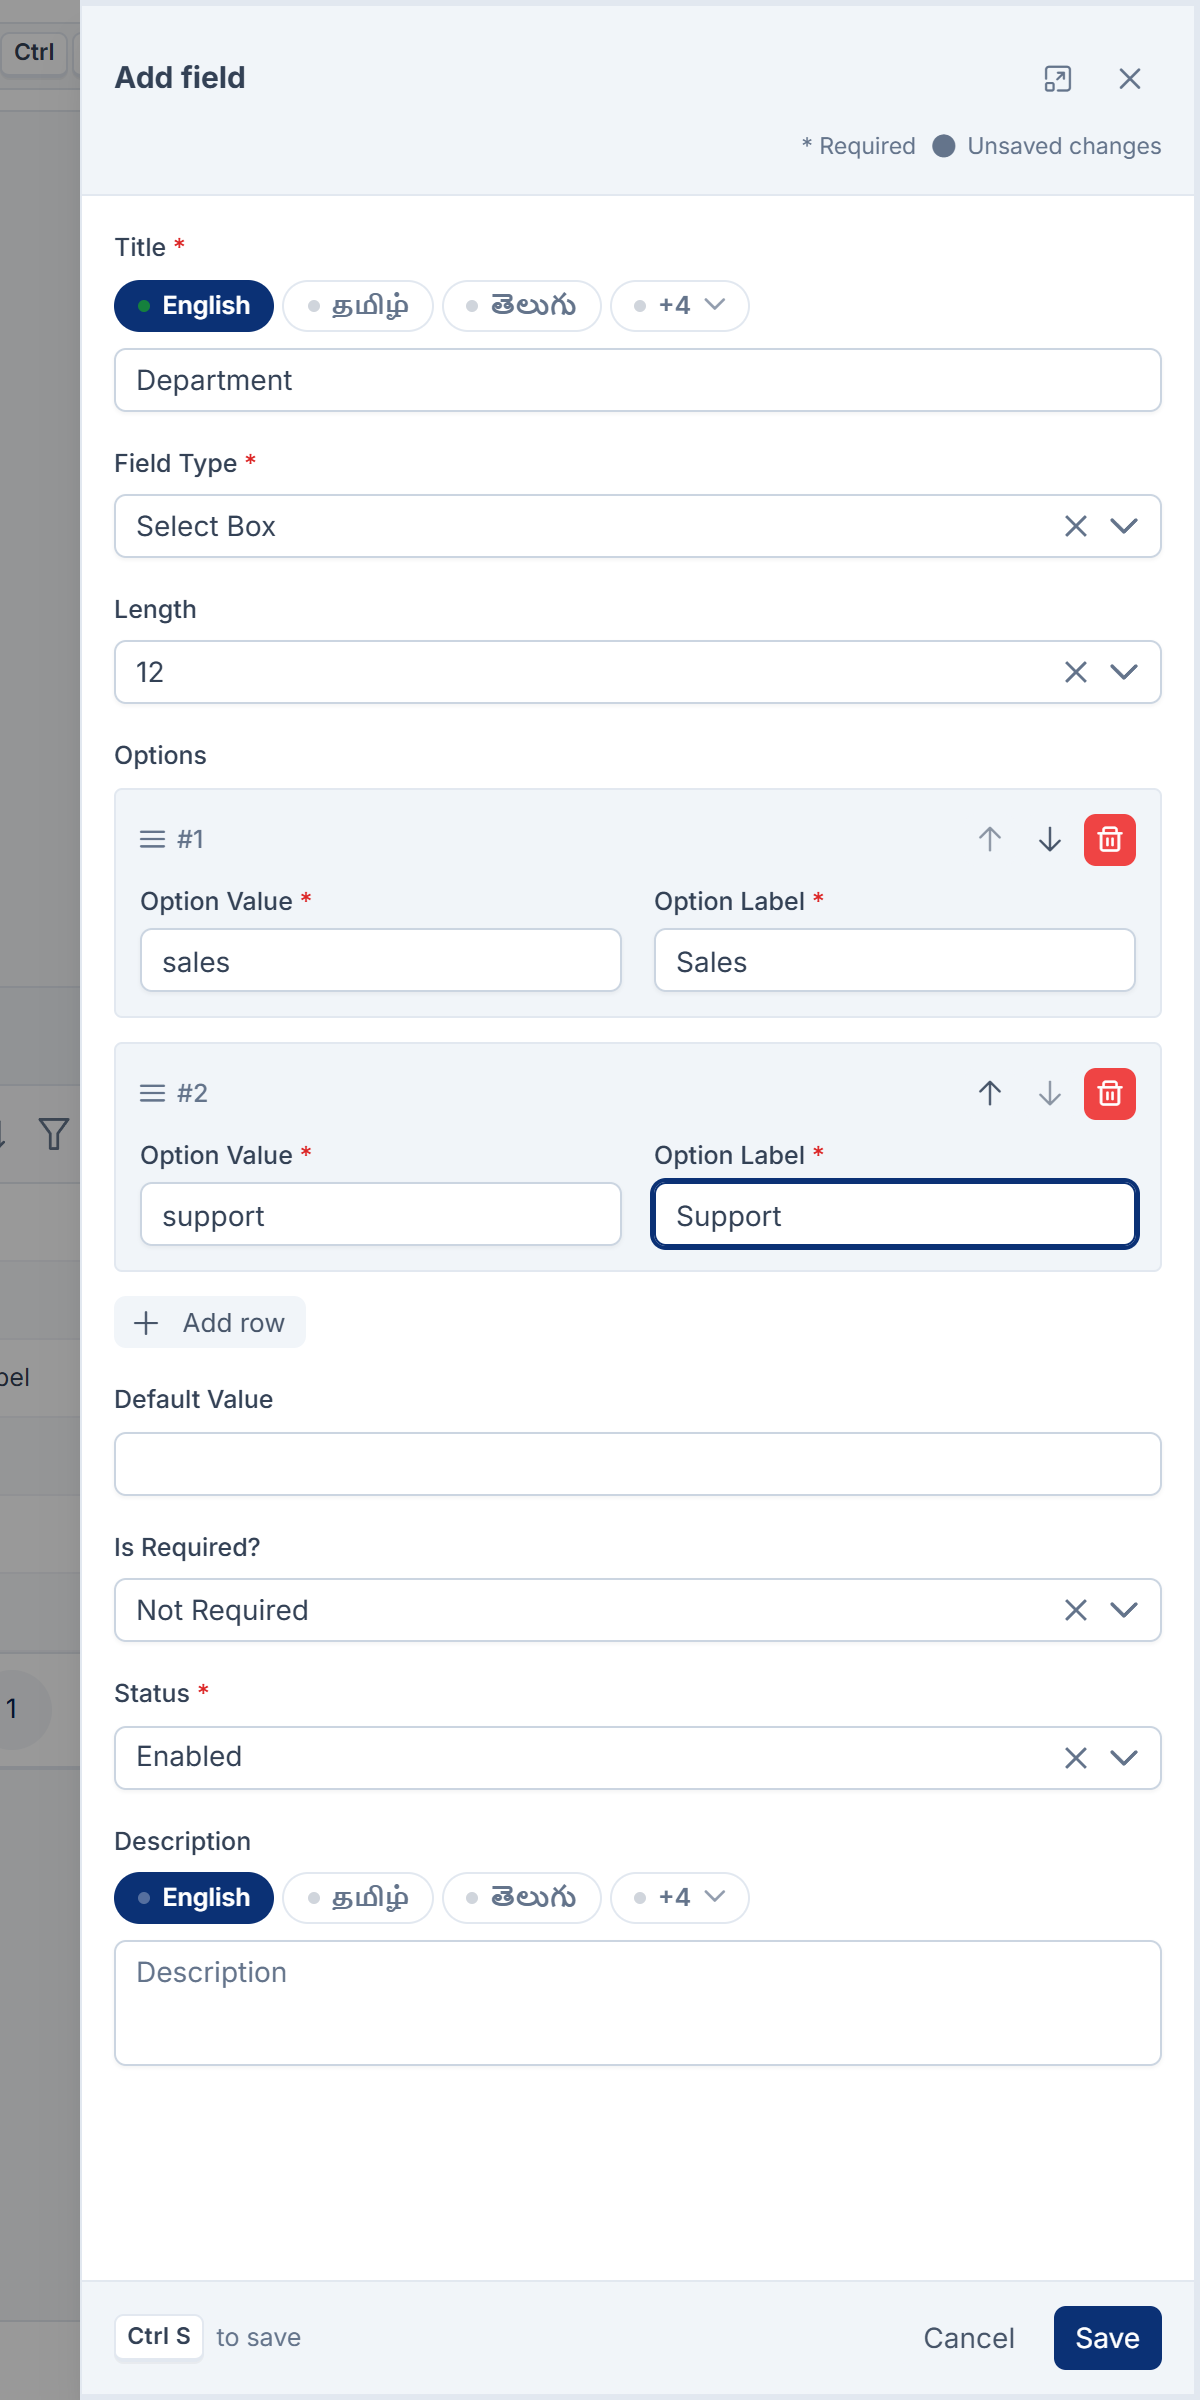
-
In Is Required?, choose Required if every user must have a department, or leave Not Required.
-
Leave Status on Enabled.
-
In Description, add a short hint if it helps. It appears as a tooltip beside the field.
-
Select Save.
You see Custom Field Department Created Successfully! The field is listed with the name department, and the Live preview shows it as it will look on the user form.
What happens next
- Open Users Accounts › Users and create or edit a user. Department is on the Profile step. See Create a user.
- A required field is required from now on, including when someone edits an existing record that has no value yet.
- To group fields under a heading, or put them in order, see Group and reorder custom fields.
- For what each field type and setting does, see Custom field types, settings and permissions.
Tip: Two fields on the same entity can't share a name. If Laramin refuses your title, look in the Name column for a field that already has it, and choose another title. A field in the trash doesn't block the name.
Thanks. That helps us decide what to write next.
Thanks for telling us what was missing.
You already answered for this article today. Thanks.
We got a lot of answers from your network just now. Try again in a few minutes.
We couldn't send that. Check your connection and try again.
Links in this article
Printed from help.bsscn.com. The online article may have changed since.